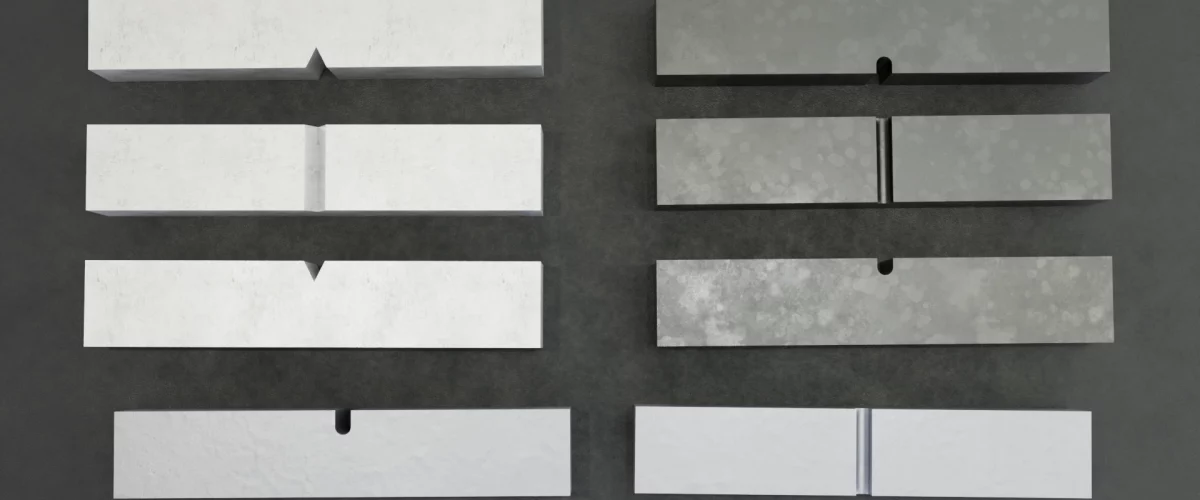
Obtaining reliable and accurate results from impact testing of metals requires notch verification. This verification process confirms that the notches on test samples are in compliance with established standards, directly influencing test accuracy and material integrity assessments. Notch verification is especially relevant in industries where even a small deviation in material performance can lead to substantial safety risks. If notches are not positioned or shaped correctly, impact test results may deviate, misrepresenting the material’s true performance capabilities.
The relationship between accurate notch verification and product safety is well-supported by research. Studies have shown that improper notching can result in discrepancies of up to 20% in impact energy readings, which could mean the difference between a material passing or failing safety standards. To mitigate these risks, standards such as ASTM E23 and ISO 148-1 define strict requirements for notch dimensions and shape, as well as precise testing procedures. Compliance with these standards helps manufacturers maintain product quality, making sure their materials can withstand operational stress and protect end-users.
What is Notch Verification?
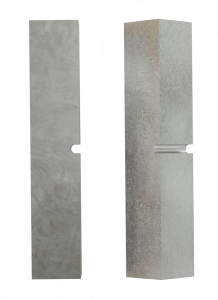
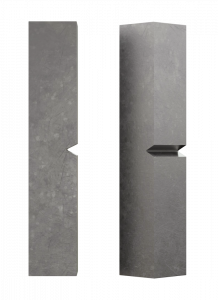 Notch verification is the process of precisely measuring and confirming the geometry of notches on test specimens. It helps to verify that they meet the required specifications for impact testing. A notch is a small, deliberately engineered groove or indentation in a sample, specifically designed to focus stress at a particular point. This helps to replicate real-world failure conditions by allowing testers to assess how the material behaves under impact. Properly verified notches guarantee the accuracy of the test, notably when results can greatly impact safety decisions in fields such as aerospace and automotive.
In notch verification, each detail matters. The dimensions, depth, and shape of the notch must align precisely with standards like ASTM E23 and ISO 148-1, which are commonly used to guarantee consistent and accurate testing conditions. For instance, ASTM E23 requires a V-notch or U-notch with specific angles and depths specific to the different material types. A typical V-notch, for instance, has a 45-degree angle with a depth of 2 mm, with strict tolerances to maintain consistency. Deviation beyond these limits—even by fractions of a millimeter—can skew impact energy absorption measurements by up to 15%. This could result in the material failing or passing under incorrect toughness assumptions.
Why are these notches so critical? In impact testing, the notch serves as a predetermined point of failure, allowing the test to replicate real-world stresses that cause materials to crack or fracture. By concentrating stress at a single point, the notch makes it possible to analyze how a material absorbs energy under sudden force, a factor vital for evaluating materials used in high-stress applications.
Industry standards such as ISO 148-1 further reinforce this need for precision by defining not only the exact shape and depth of notches but also the materials and methods used for preparing samples. These standards are designed to make sure that notch verification is repeatable and reliable. Thus, all laboratories and manufacturers can perform impact testing under equivalent conditions. Proper implementation of notch verification standards makes certain that test results can be trusted, providing valuable data for industries where safety and durability are key considerations.
Importance of Notch Verification in Impact Testing Accuracy
Accurate notch verification is a key component for reliable impact testing results. When notches deviate even slightly from specified dimensions, test outcomes can be significantly affected. An incorrectly sized or placed notch can cause inconsistencies in how force is distributed across the material, often leading to skewed energy absorption readings. For instance, studies indicate that a misalignment in notch depth by as little as 0.1 mm can affect test results by up to 12%, potentially impacting the material’s evaluated performance under stress.
Such inaccuracies have real-world consequences, especially in industries that rely on impact testing to validate materials used in high-stakes environments. For instance, in the aerospace industry materials undergo stringent impact testing to withstand extreme conditions. If notch verification is not performed right, materials deemed durable might be too brittle, risking failure when in use. This can result in product recalls, costly repairs, or even severe safety hazards.
Moreover, consistent notch verification supports a broader framework of quality control in manufacturing. By being certain that each sample is accurately prepared, companies reduce the variability of their testing processes, building a database of reliable material performance metrics. This consistency is crucial for engineers and designers who depend on trustworthy data to decide which materials to use in critical applications. Without accurate notch verification, these decisions are based on unreliable data, which can lead to unexpected service failures.
As a matter of efficiency, verified notches simplify the testing process. By maintaining precise notch dimensions, laboratories can minimize retests due to faulty samples, reducing operational delays and costs. It also simplifies compliance documentation since reliable notch verification aligns with industry standards.
Ultimately, notch verification’s role extends beyond a single test—it builds trust in the testing process, guaranteeing that material properties are consistently evaluated, data remains dependable, and safety is prioritized. Accurate impact testing depends on this foundational step, reinforcing the entire chain of material production, quality control, and end-use reliability.
Methods and Equipment for Notch Verification
 Effective notch verification depends on precise tools and methods to make sure that each test specimen complies with specific standards. The process begins with common verification tools like optical comparators, high-resolution microscopes, and digital verification systems. Optical comparators are frequently used to visually inspect notch dimensions against a scaled reference image, allowing for quick and reliable measurement of angles and depths. Microscopes with measurement capabilities further improve accuracy by allowing operators to observe minute details within the notch, critical for meeting exacting standards in impact testing. Digital verification systems, often equipped with software for real-time data capture, provide a fast, precise method of measuring notch geometry and are especially useful in high-volume testing environments.
In recent years, advancements in automation and precision tools have transformed notch verification, introducing a new level of repeatability and efficiency. Automated verification systems, such as CNC (Computer Numerical Control) systems, simplify the process by accurately cutting notches to exact specifications, reducing human error, and achieving consistent results. CNC-based verification methods can work with tolerances as small as ±0.005 mm, making them ideal for industries where high precision is crucial. Additionally, specialized equipment such as the notch verification projector system assists in verification by providing detailed projections and measurements, allowing operators to validate notch dimensions with exceptional clarity.
Calibration is a fundamental step: regular calibration of tools and machines makes certain accurate measurements over time, which is particularly important for digital and automated systems. Equipment maintenance, including cleaning and alignment checks, also makes sure that devices function correctly and consistently. Operator training is another crucial factor—knowledgeable operators are better able to use these tools effectively, interpret data accurately, and identify potential issues with sample preparation or equipment setup.
Incorporating these advanced tools and following best practices enhances accuracy and contributes to efficient and consistent notch verification. When companies invest in reliable equipment and train their operators well, they build a solid foundation for quality control. Hence, each impact test accurately reflects the material’s performance potential. Through this comprehensive approach to notch verification, industries can achieve reliable, repeatable results that meet both internal quality standards and regulatory requirements.
Looking for a Precise Notch Verification Tool?
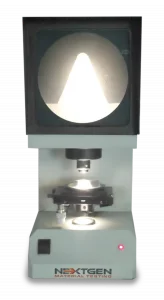 As a leading provider of material testing equipment for years, we understand the crucial role that precision has in impact testing. That’s why we are pleased to introduce the Charpy/Izod Notch Verification Projector System NG-NPS-CIS—an ideal choice for those seeking a dependable tool to verify notches accuracy and alignment in test samples.
Our notch verification projector system combines cutting-edge optical projection technology with straightforward, user-friendly operation. Designed to comply with ASTM E23 and ISO 148 standards, it makes certain that notches meet exact verification specifications. By projecting a magnified 50x view of the sample onto a clear 200mm screen, the system enables technicians to verify whether U-type or V-type notches are within standard tolerances, quickly highlighting any deviations that could compromise test results.
What sets this system apart is its flexibility and robust design. Equipped with adjustable vertical and horizontal table displacement (±10mm) and a 0-360° rotation range, the NG-NPS-CIS provides flexibility for precise sample positioning. This feature is particularly beneficial for labs that handle a variety of notch shapes and sizes, as it allows easy adjustments to meet diverse testing needs. The powerful 12V, 100W halogen, and tungsten lighting increases visibility, enabling operators to conduct inspections with ease, even in low-light conditions.
In addition to its technical capabilities, the NG-NPS-CIS offers practical advantages that material testing professionals value. The system is equipped with NIST-certified consumables. Nextgen maintain a steady supply of spares and replacements, so labs can depend on consistent performance without downtime. For ongoing support, we provide lifetime product assistance and trusted technical support to make sure users can always get the best results from their testing equipment.
For laboratories focused on accuracy and compliance, the Charpy/Izod Notch Verification Projector System NG-NPS-CIS is much more than a tool for verifying results; it’s a long-term investment in reliable testing results. Its smooth operation and high standards make it a powerful addition to any testing setup, guaranteeing that each notch verified contributes to trustworthy, industry-compliant results.
Challenges in Notch Verification and How to Overcome Them
 Notch verification, while necessary for impact testing accuracy, presents several technical challenges that complicate the testing process. One of the primary issues is variability in notch quality, often arising from inconsistencies in notch dimensions, angle, or depth due to cutting and verification equipment limitations. Minor variations, sometimes even within accepted tolerances, can impact test results, especially in precision tests. In addition, equipment limitations—such as low-resolution measurement devices or inconsistent lighting conditions—can hinder clear visibility, leading to inaccurate measurements and, ultimately, unreliable data.
The use of high-resolution measurement tools is imperative for addressing these challenges. Optical comparators and digital projectors, particularly those with magnification capabilities like 50x or higher, offer improved visibility, enabling it to be easier to detect even the smallest deviations in notch geometry. Automated systems, such as CNC-based notch preparation, can further reduce human error by producing notches with repeatable precision. These tools allow for consistent notch production and verification, maintaining data accuracy over multiple tests.
Another key strategy involves regular calibration checks. Verification equipment, like any high-precision device, requires frequent calibration to make sure it remains within its specified measurement tolerances. Without routine calibration, small drifts in accuracy accumulate over time, leading to gradual test results deviations. Consistent calibration, in conjunction with regular equipment maintenance, helps laboratories maintain precise measurement standards and enhances reliability across different testing setups.
Real-world examples demonstrate the importance of meticulous notch verification. For instance, in 2018, a steel manufacturer faced costly recalls after impact testing revealed substandard toughness in certain construction products. Investigations traced the issue back to slight inconsistencies in notch verification procedures, which introduced variations in impact test results between different batches. By upgrading to automated verification systems with advanced optical comparators, the company reduced these inconsistencies, improving product reliability and testing efficiency.
These examples illustrate how addressing notch verification challenges isn’t just about meeting industry standards—it’s about preventing costly errors and improving safety. By investing in precise measurement tools, embracing automation, and enforcing strict maintenance routines, companies can overcome these common challenges. This will enable them to achieve consistent, dependable notch verification that upholds impact testing accuracy and materials integrity.
Achieving Accuracy in Impact Testing with Notch Verification
Notch verification is a fundamental component of accurate and reliable impact testing results. By confirming that notches meet precise dimensions and align with industry standards, labs can trust that their test data reflects the true performance and durability of materials under stress. In industries where safety, quality, and compliance are of prime importance, notch verification serves as a safety precaution, helping manufacturers avoid costly errors, product recalls, and potential safety risks.
Investing in precise verification tools and maintaining rigorous calibration and quality control practices is key to providing consistent results. Advanced equipment, such as automated and high-resolution measurement systems, increases testing efficiency and accuracy, making it easier for labs to uphold standards in every test.
Looking ahead, the future of notch verification may include advancements like AI-driven inspection systems and real-time monitoring, which could bring unprecedented accuracy and efficiency to the verification process. Such innovations could transform the impact testing field, helping companies maintain compliance and optimize product performance with even greater precision.
At NextGen Material Testing, we’re committed to helping you find the right options for notch verification equipment. We offer a comprehensive range of tools for Charpy and Izod systems to meet your lab’s specific needs. If you have questions or want to explore our solutions, please contact us directly or request an online quote. Our team is here to assist you!
