Metal Testing Equipment
Standards
ASTM E384, ASTM E92, ISO 6507, ISO 4545-2


Description
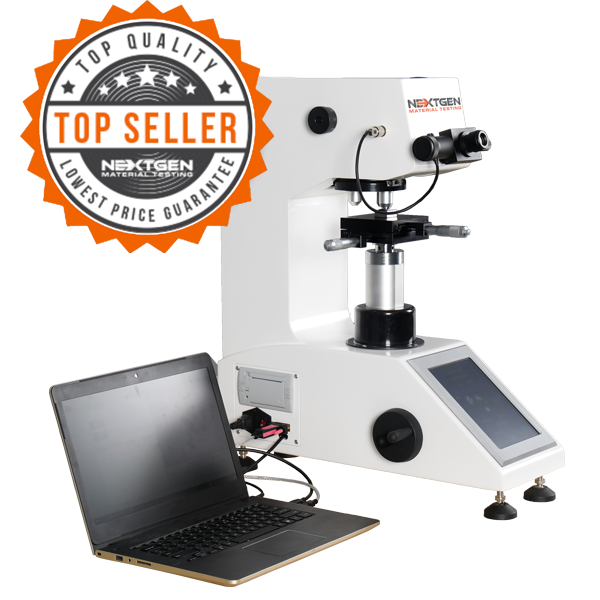
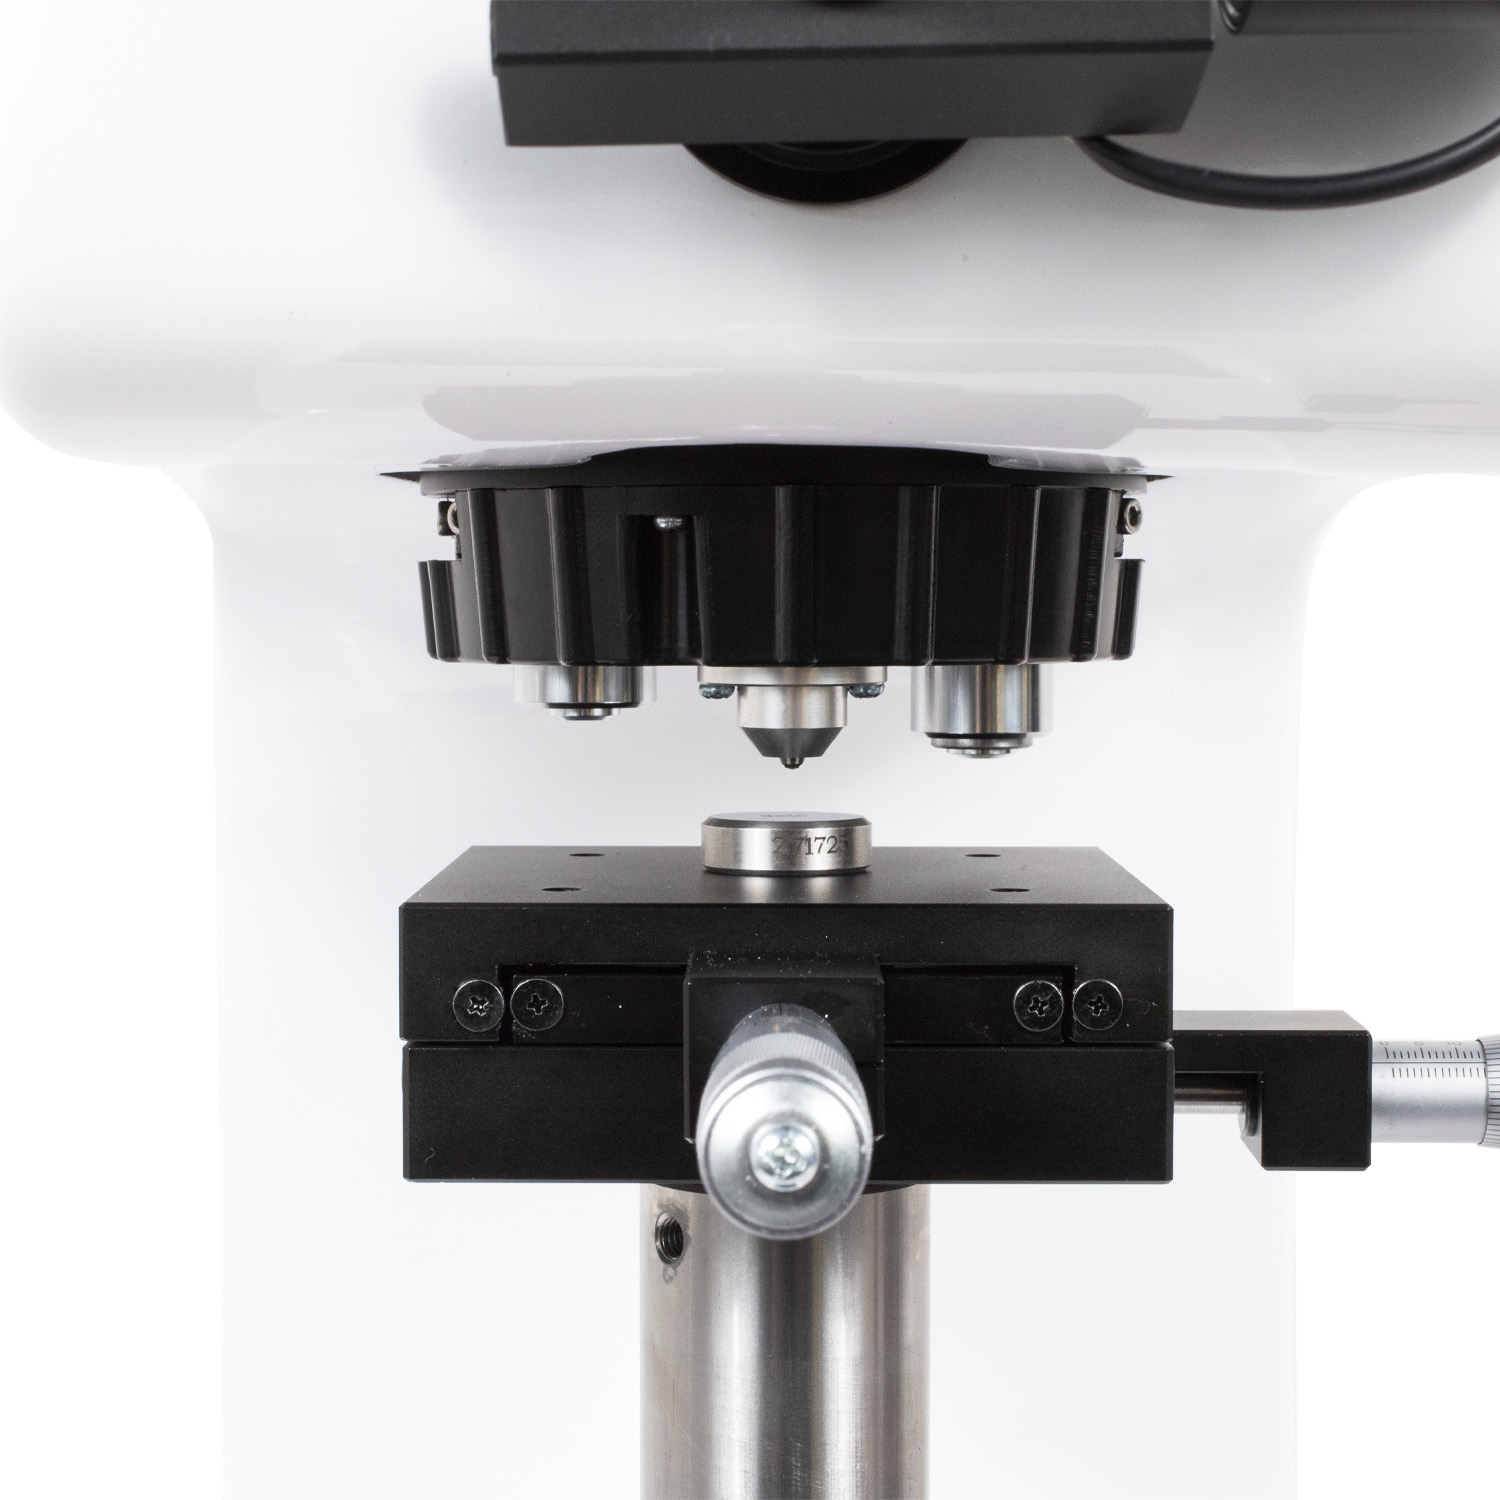
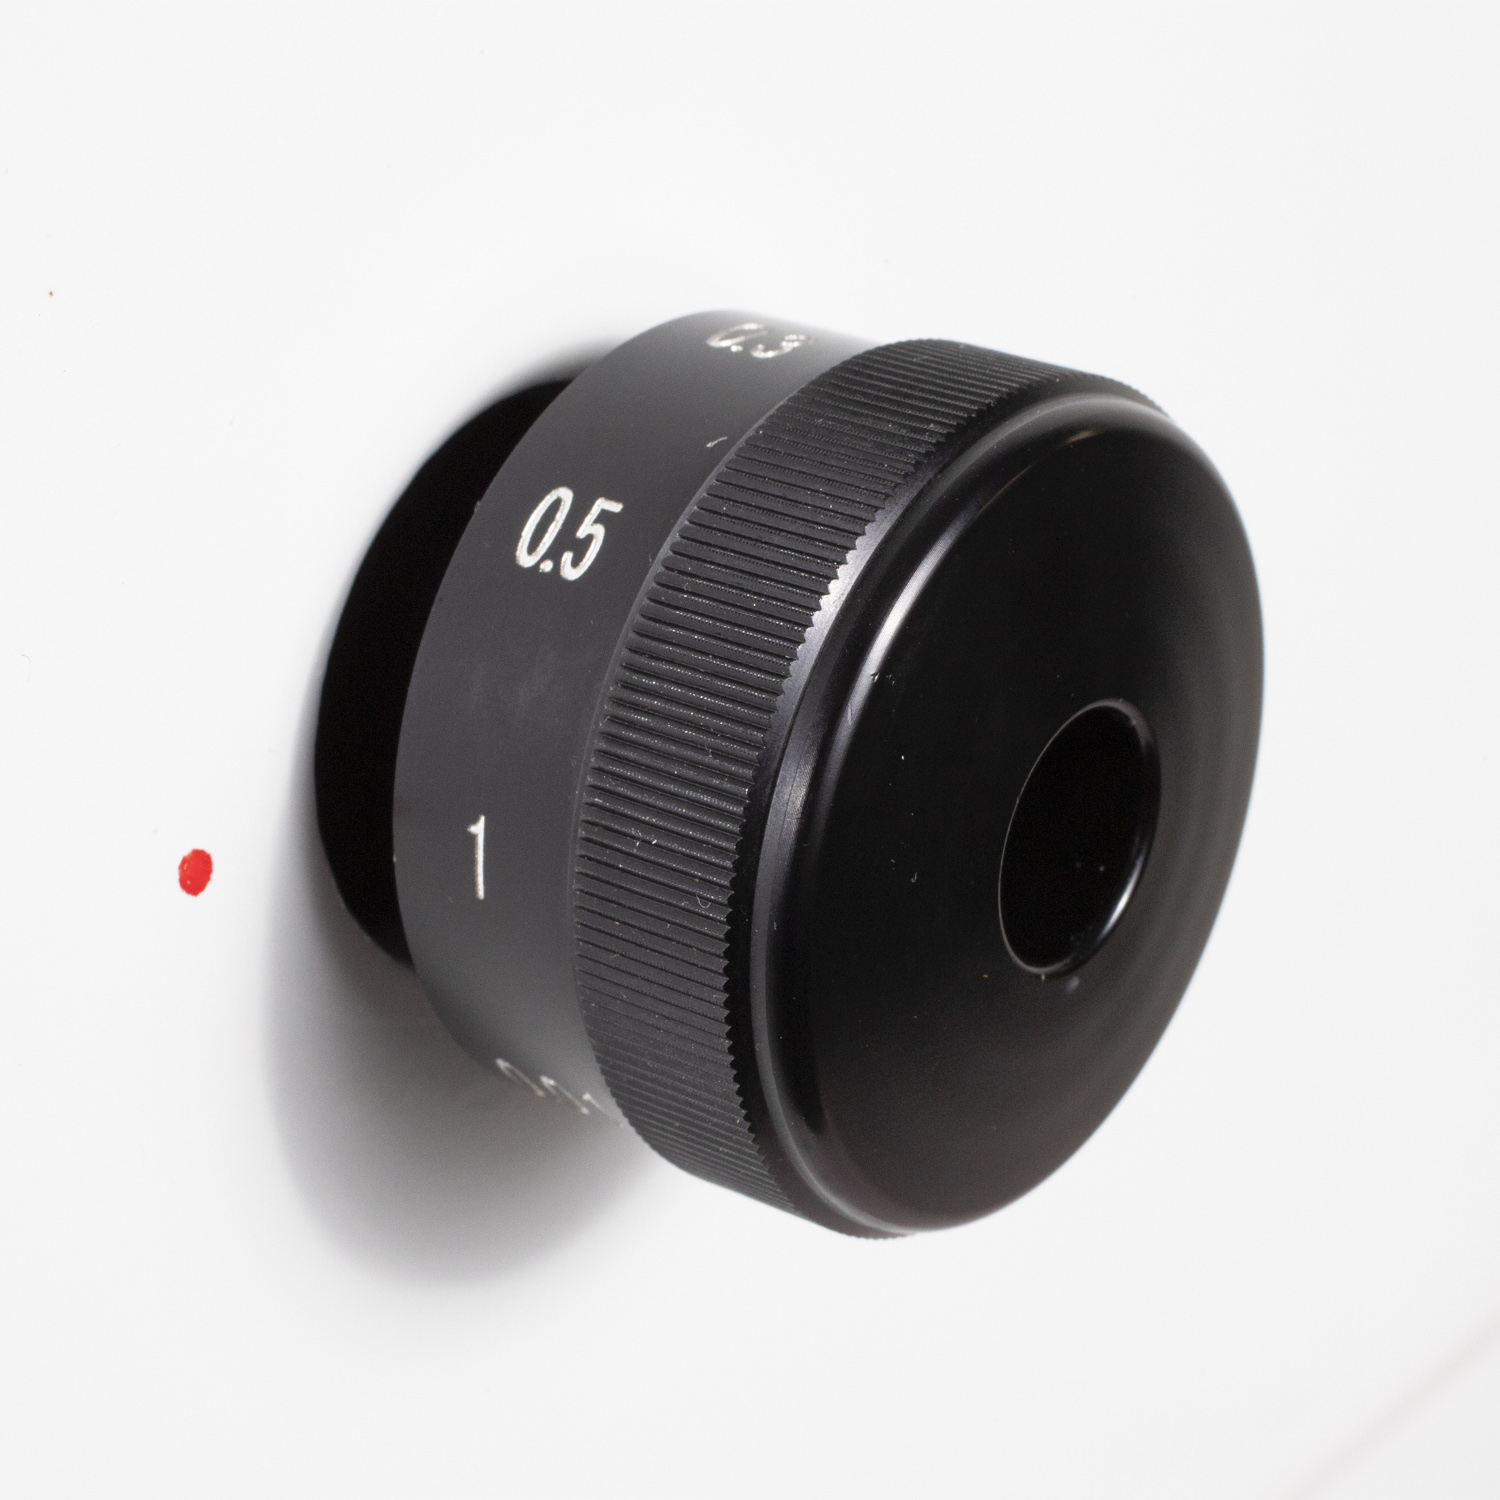
The NG-1000 - Micro Vickers and Knoop Hardness tester is the most advanced hardness tester for accurate measurements and ease of use. The NG-1000 - Micro Vickers and Knoop Hardness tester comes standard with a motorized turret and is available in three (3) different configurations to suit all requirements. The series includes the NG-1000 - Micro Vickers and Knoop Hardness tester AGEN - Standard Digital Vickers Hardness Tester, DGEN - Digital Vickers Hardness Tester and CCD - Digital Vickers Hardness Tester with CCD Optical Analysis Software. You can learn more about the basics of Vickers Hardness Test.
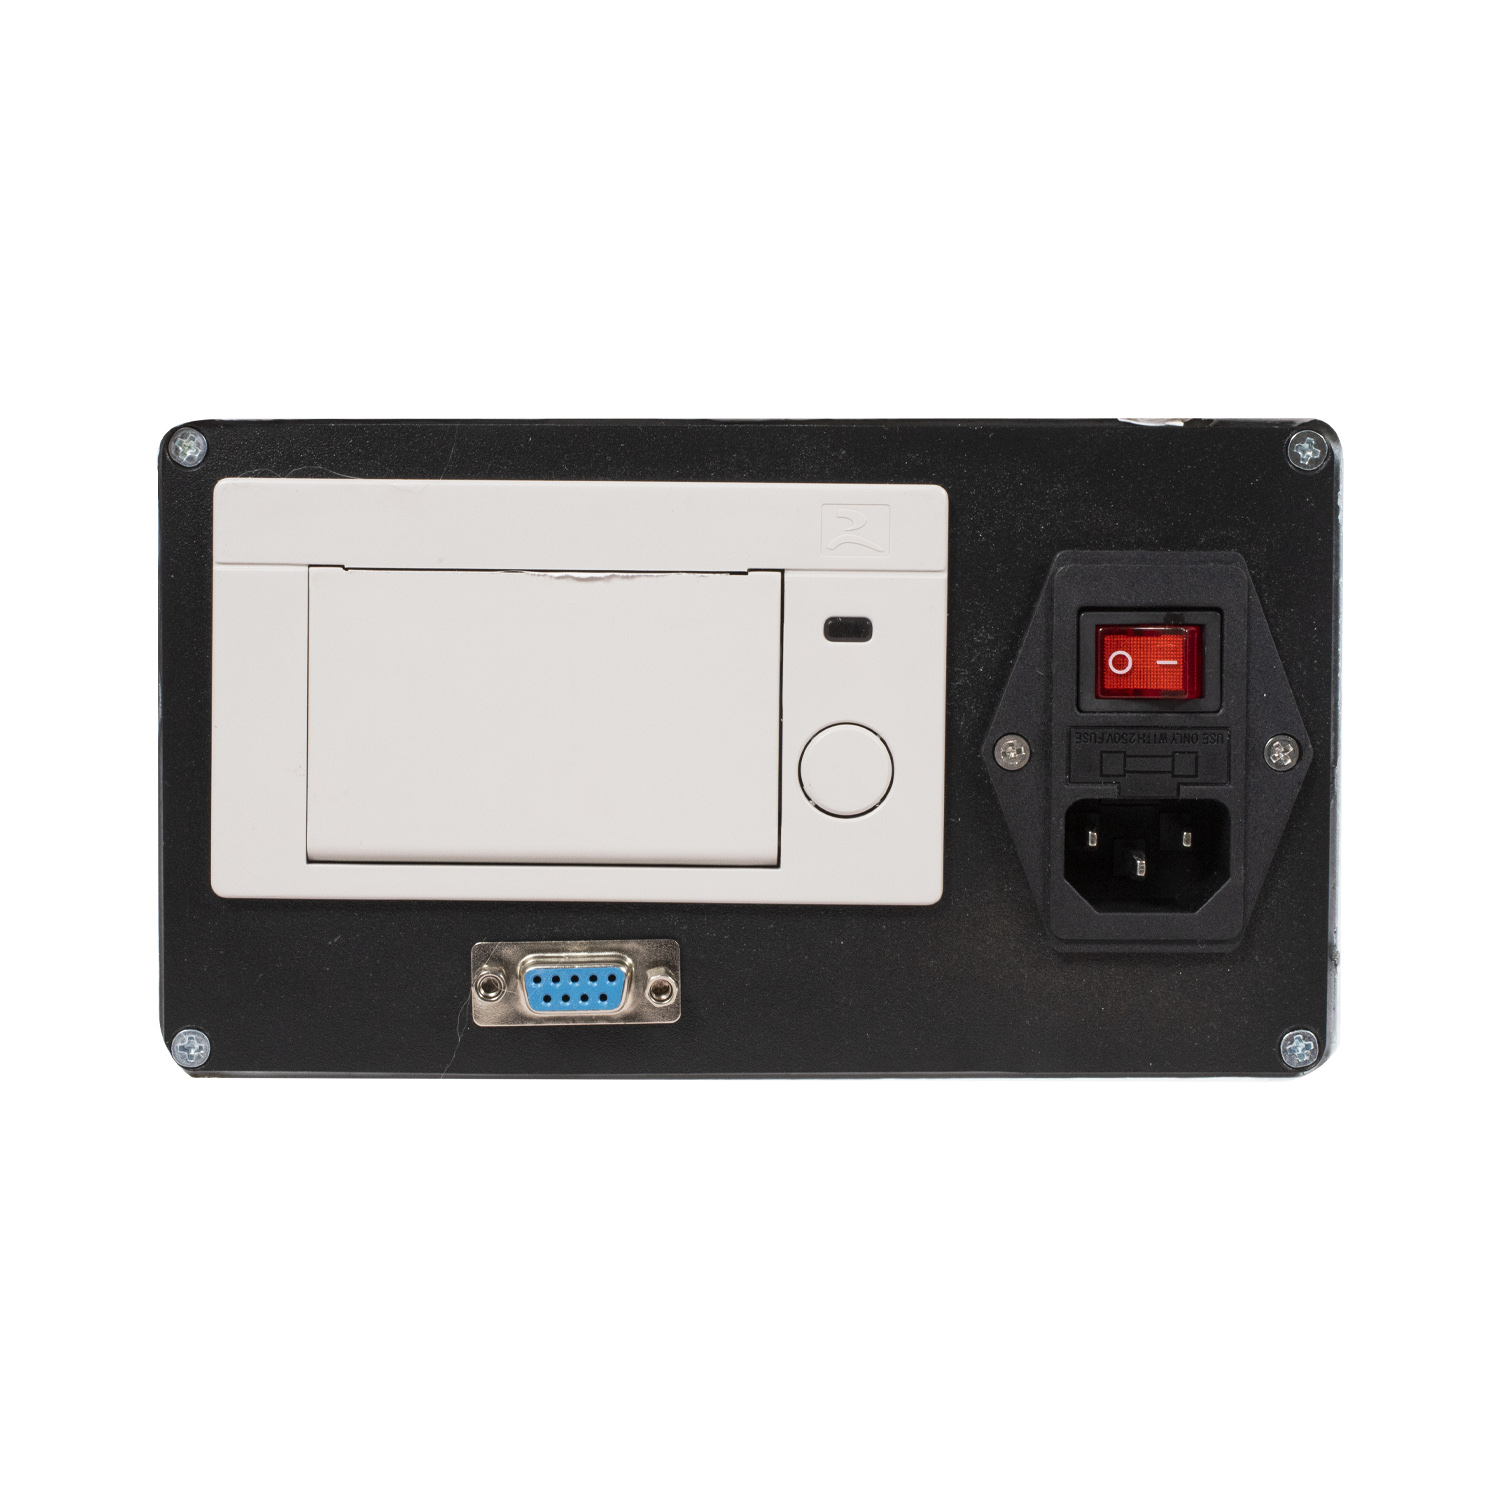
The NG-1000 - Micro Vickers and Knoop Hardness testers are equipped with a large LCD display and a user friendly interface for controlling all aspects of your test. It features a built in printer to allow the operator to print and document the series of hardness readings. The motorized turret automatically controls the changing of the objective lenses and indenter positions for the quickest analysis. The loading and unloading of the test force is fully automated as well and is held for the specified dwell time (1-99 seconds).Our most advanced NG-1000CCD - Micro Vickers and Knoop Hardness tester system includes a high quality CCD Camera and is packaged with our VickSoft Vickers Hardness Test Software. The software will use the indentation image from the CCD camera to detect your Vickers hardness value. Our user friendly VickSoft software allows you to categorize your hardness results by part number/IDs and can then be further exported into a testing report.
- Guided by optical cross rails to ensure the highest guiding accuracy
- Fast and smooth force transmission can be achieved by using the secondary transmission force of the rack and pinion.
- This machine is equipped with our most advanced high transmission ratio high precision worm gear rod which can achieve stable continuous lifting, and greatly improved the accuracy and repeatedly of the testing process. This update is in the improved working performance and working efficiency.
- Equipped with dual optical path, one optical path for eyepiece system, another path for CCD camera, both paths can work at the same time without the need to switch the optical path rod. This greatly extend the service life of the optical system, and make the testing process much simpler.
- High definition 8’’ touch screen interface with menu structure and digital eyepiece with a built-in encoder. One-push encoder button provides the diagonal length of indentation D1, D2 and hardness value will display on touch screen directly for easiest and most optimal operation.
- With hardness conversion function, the system can easily convert HV to HRA, HRB, HRC, HBW, and other scales.
- Standard with (HV & HK) Vickers and Knoop hardness testing capabilities.
- OK/NG judgement
- Includes (10X & 40X) lenses for measurement suitable to test wide hardness range of materials from the softest to the hardest of materials.
NG-1000 Models
Any NG-1000 model can be upgraded to a Semi Automatic Hardness Testing System. The Semi-automatic system only has XY stage movement, therefore requires manual focus work for each of the plotted indentations. Once the manual focus is completed measurement process of indentation, measuring, and hardness curve plotting is completed with a click of a button.

NG-1000CCDCCD - Micro Vickers and Knoop Hardness tester measurements are performed through a CCD Camera combined with an Analytical Software Read More |

NG-1000DGENDGEN - Digital Micro Vickers and Knoop Hardness tester measurements are made through the eyepiece Read More |

NG-1000AGENAGEN - Standard Digital Micro Vickers and Knoop Hardness tester measurements are made through the eyepiece. Read More |
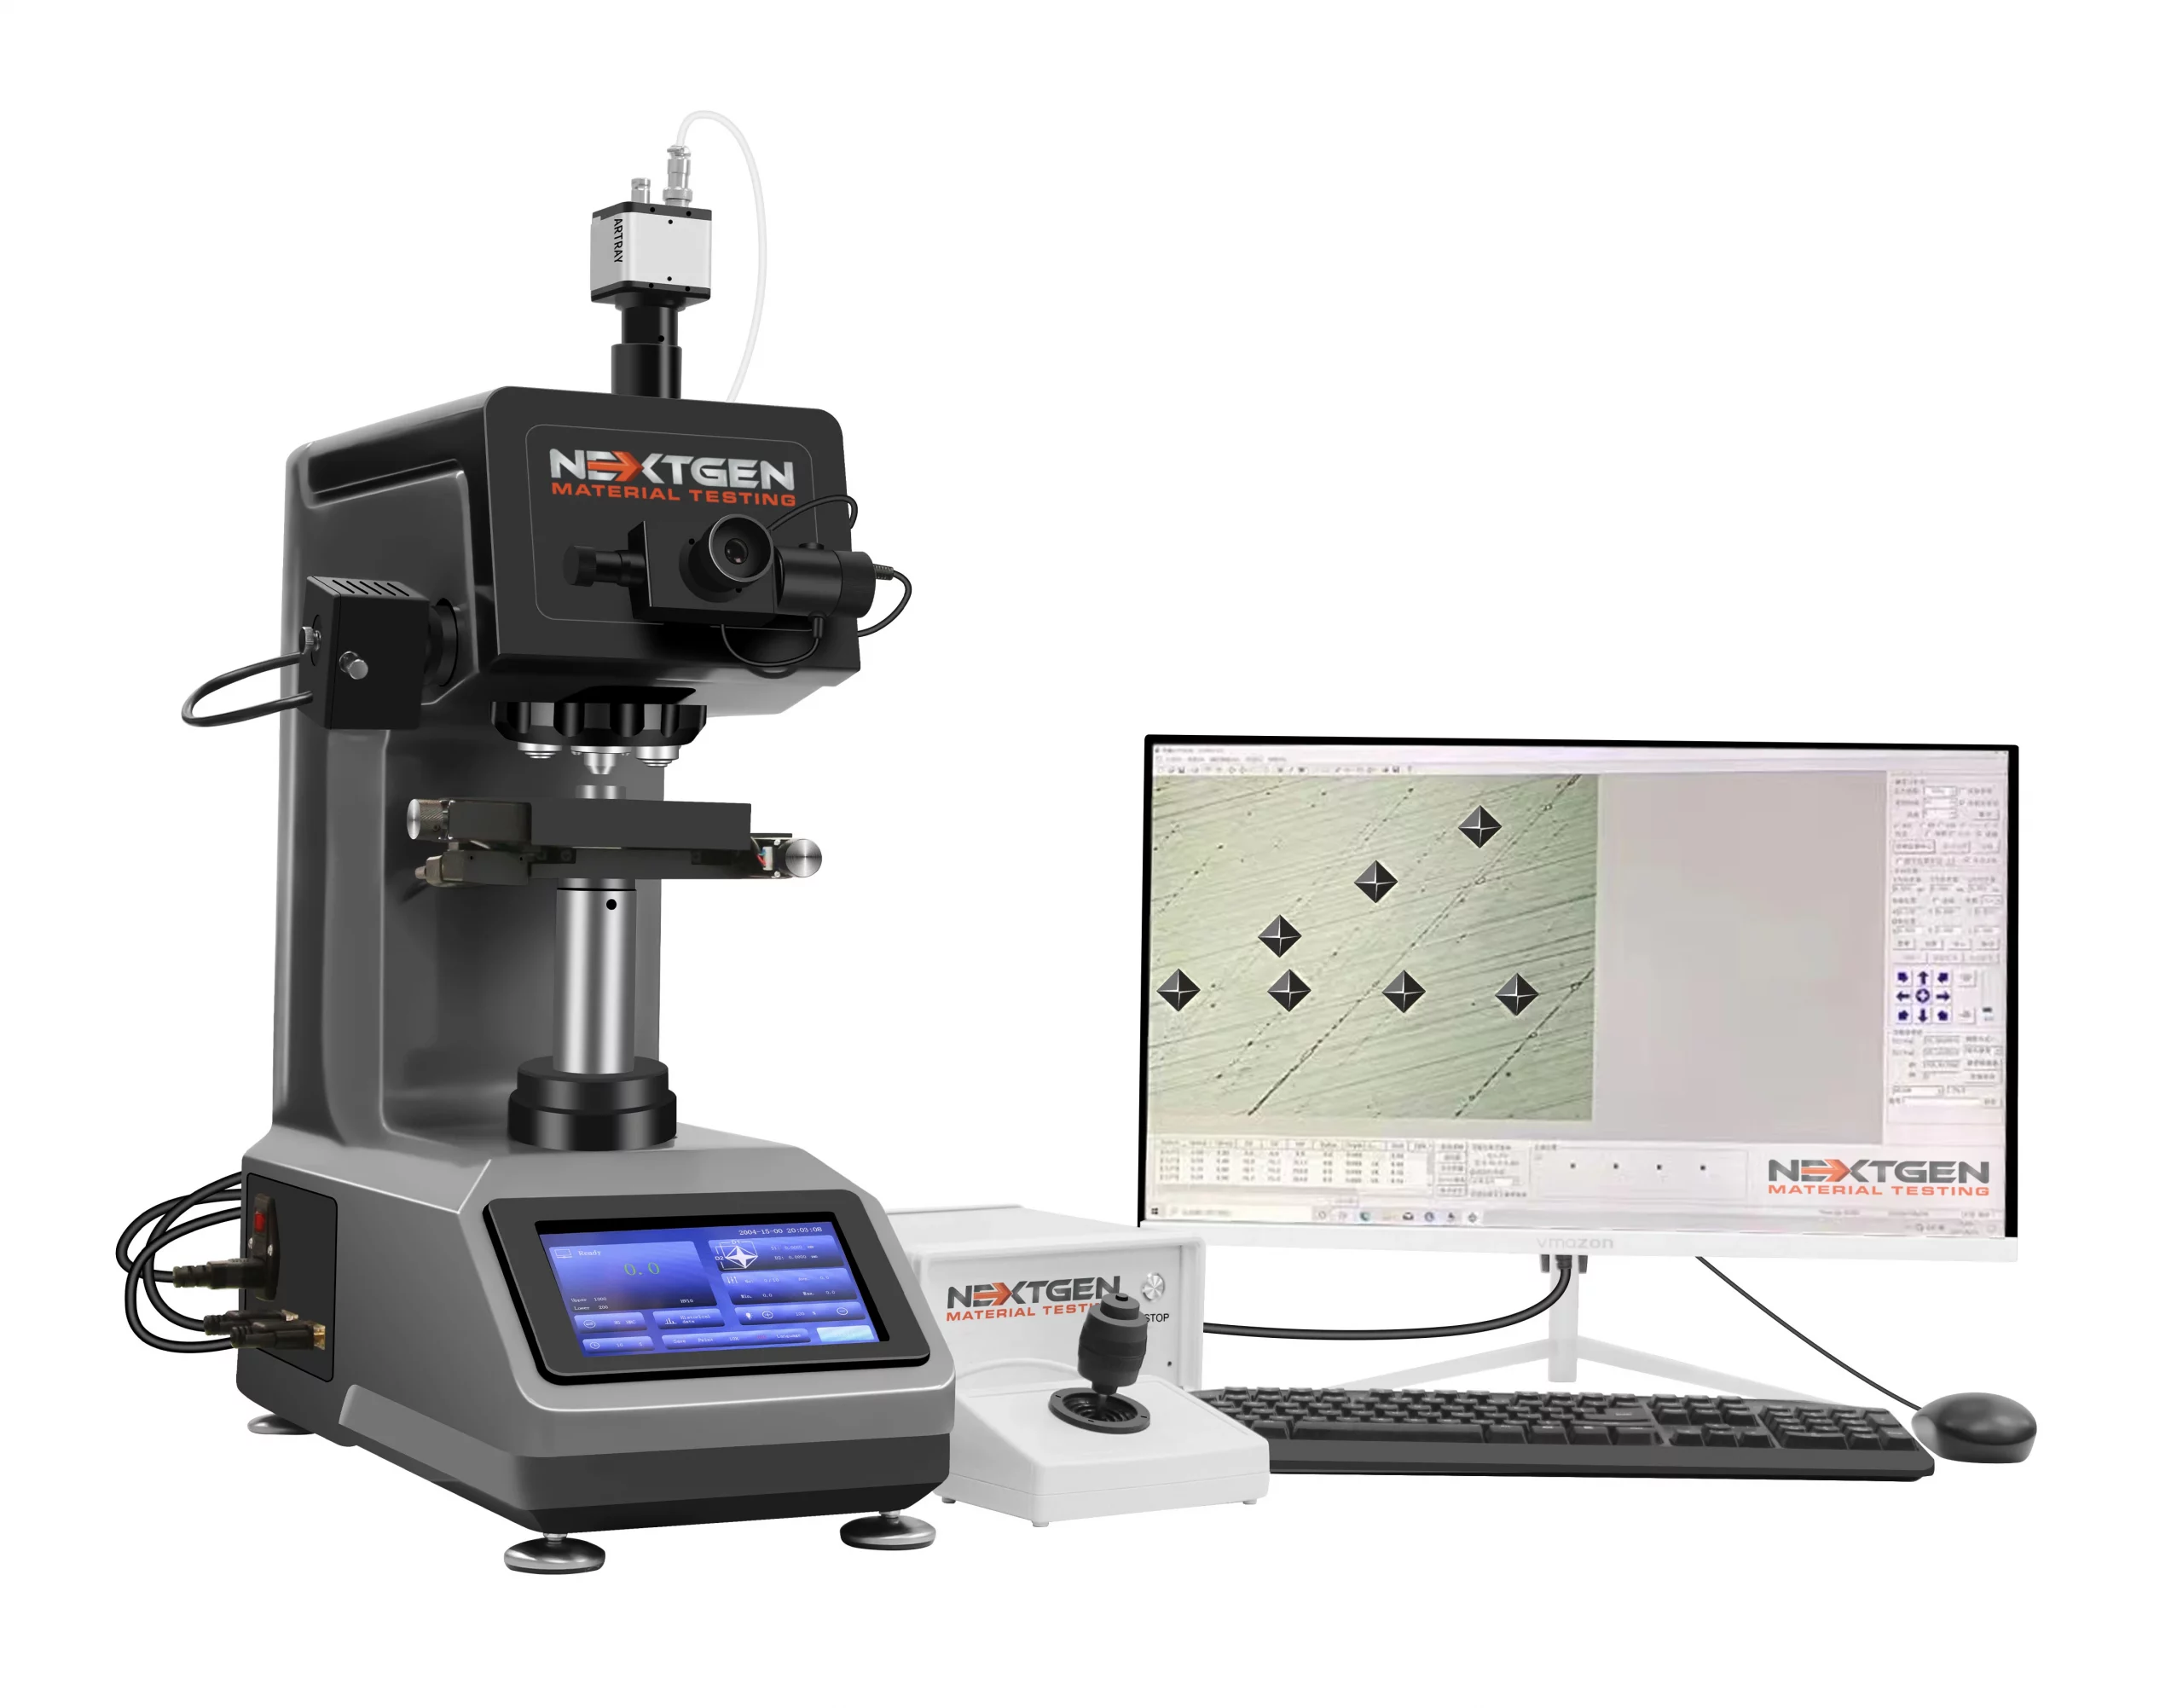
NG-1000CCD SEMIAll of the benefits of the NG-1000CCD system with a motorized XY stage Read More |
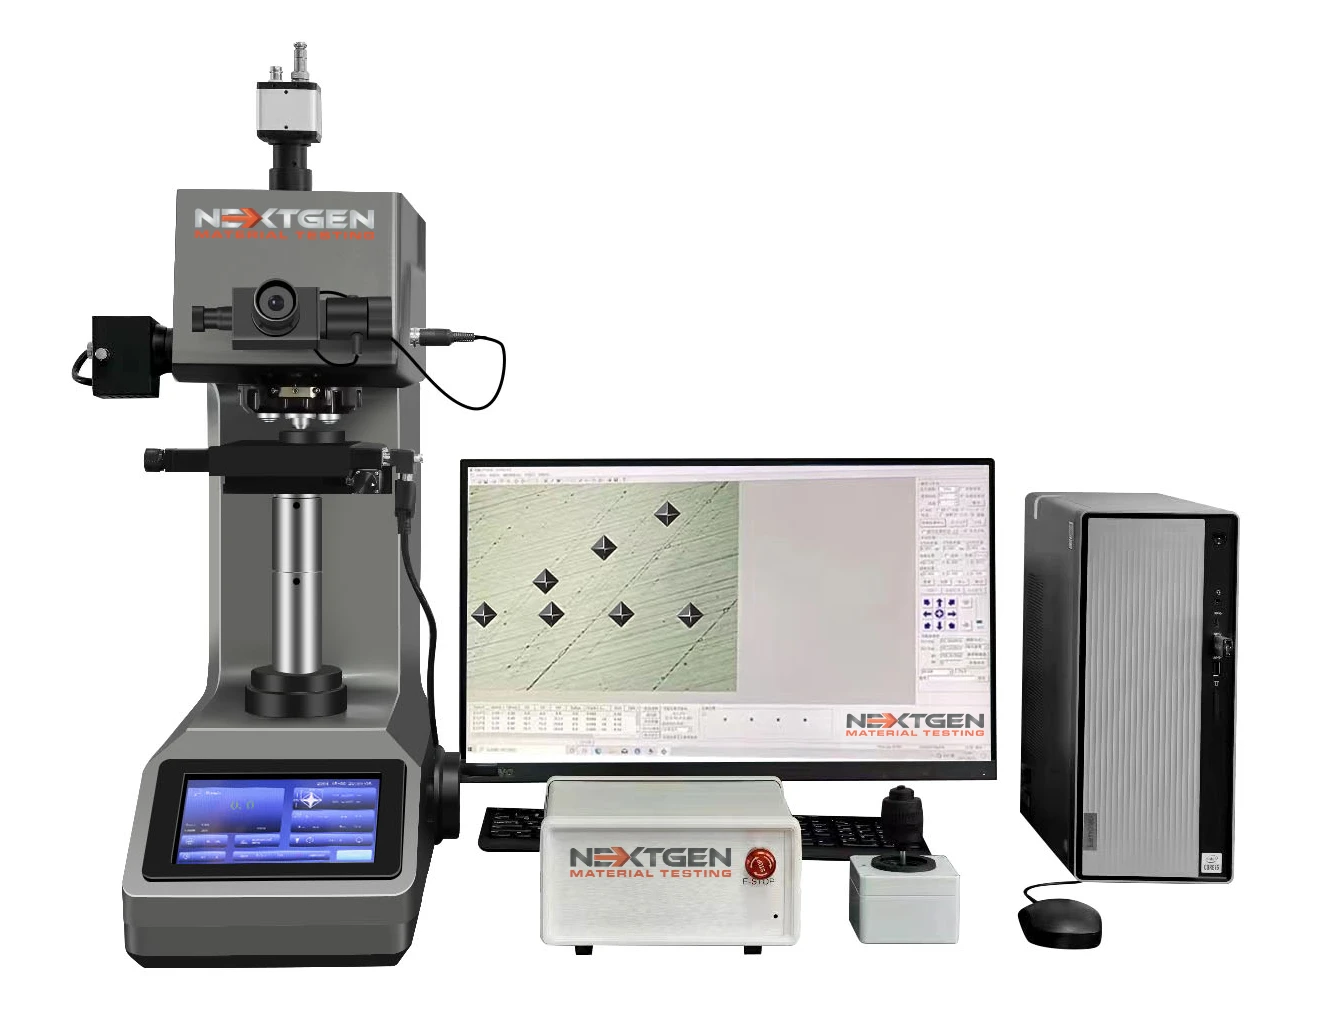
NG-1000CCD FAAll of the benefits of the NG-1000CCD SEMI with the automated Z axis control Read More |
Technical Specifications
| NG-1000CCD | NG-1000DGEN | NG-1000AGEN | NG-1000CCD SEMI | NG-1000CCD FA | |
| Testing Forces | 8 Testing Forces 10g(0.098N), 25g (0.245N), 50g (0.49N), 100g (0.98N ), 200g (1.96N), 300g (2.94N), 500g (4.9N), 1000g (9.8N) |
||||
| Vickers Scales | HV0.01, HV0.025, HV0.05, HV0.1, HV0.2, HV0.3, HV0.5, HV1, HV2 (Optional) | ||||
| Conversion | The unit can convert your Vickers value to HRA, HRC, HR15N, HR30N, HR45N, HB | ||||
| Minimum Measuring Unit | 0.01μm | ||||
| Vickers Value Range | 1HV - 4000HV | ||||
| Eyepiece | 10x Magnification Eyepiece | ||||
| Objectives | 10x (Observation) and 40x (Measurement) | ||||
| Vickers Value | Displayed on the instruments display as well as the computer software (CCD) | ||||
| Magnification | 100X (Observation), 400X (Measurement), (Can be extended to 150X or 600X) | ||||
| Loading Method | Automatically - Load, dwell and unload the testing force | ||||
| Duration | 1-99 seconds | ||||
| Turret | Automatic Motorized Turret - Objective Lenses and Indenter | ||||
| Maximum Height of Specimen | 8.5cm | ||||
| Maximum Depth of Specimen | 12cm | ||||
| Light Source | LED Cold light source (no heat generated from light source - service life of light source can reach 100,000 hours) | ||||
| Stage | Dimensions of the X-Y Testing table are 10cmx10cm Maximum Travel Range 2.5cm x 2.5cm Moving Resolution Ratio 0.1mm |
||||
| Warranty | 12 Months | ||||
| Power Source | 110V/60Hz/1Ph | ||||
| Overall Dimensions |
19.29“ x 7.28“ x 20.28“ / 49 x 18.5 x 51.5 cm (LxWxH)
|
||||
| Weight | 100lbs / 45kg | ||||
| Optional Items | 15x Eyepiece, 2000gf Load, Dual Vickers/Knoop Indenter | ||||
NG-1000CCD

Standards
Description
CCD - Micro Vickers and Knoop Hardness tester measurements are performed through a CCD Camera combined with an Analytical Software. The measurements can be made through the eyepiece or it can be done through the analysis software and CCD camera. The advanced accuracy of this Vickers hardness testing system, the Motorized Turret and the Built-in-Printer make this machine the top pick for quality control laboratories.
How to Install Macro Vickers Hardness Tester with CCD Camera Option
NG-1000DGEN

Standards
Description
DGEN - Digital Micro Vickers and Knoop Hardness tester measurements are made through the eyepiece. This system is equipped with an encoder. After using the micrometers to measure the diagonals, the system will transmit your readings from the eyepiece into the system through a single click of a button. The system will generate your hardness reading and display it on the LCD.
NG-1000 DGEN - Digital Micro Vickers Hardness Tester with Encoder
NG-1000AGEN

Standards
Description
AGEN - Standard Digital Micro Vickers and Knoop Hardness tester measurements are made through the eyepiece. After using the micrometers to measure the diagonals, you must enter your measurements manually into the tester through the numbered keypad to generate your hardness reading on the LCD.
NG-1000 AGEN - Standard Digital Micro Vickers Hardness Tester in ACTION
NG-1000CCD SEMI

Standards
Description
All of the benefits of the NG-1000CCD system with a motorized XY stage! Bring your sample into focus using the manual Z axis hand wheel and use your software for boundary scans as well as automatic hardness indentation plotting, testing and reporting!
NG-1000CCD FA

Standards
Description
All of the benefits of the NG-1000CCD SEMI with the automated Z axis control. Your NG-1000CCD FA can automatically control your focus for complete automation in hardness Vickers and Knoop testing!
NG1000 CCD FA Series - Fully Automatic Micro Vickers and Knoop Hardness Tester
Software Features: Compatible with NG-1000-CCD Only
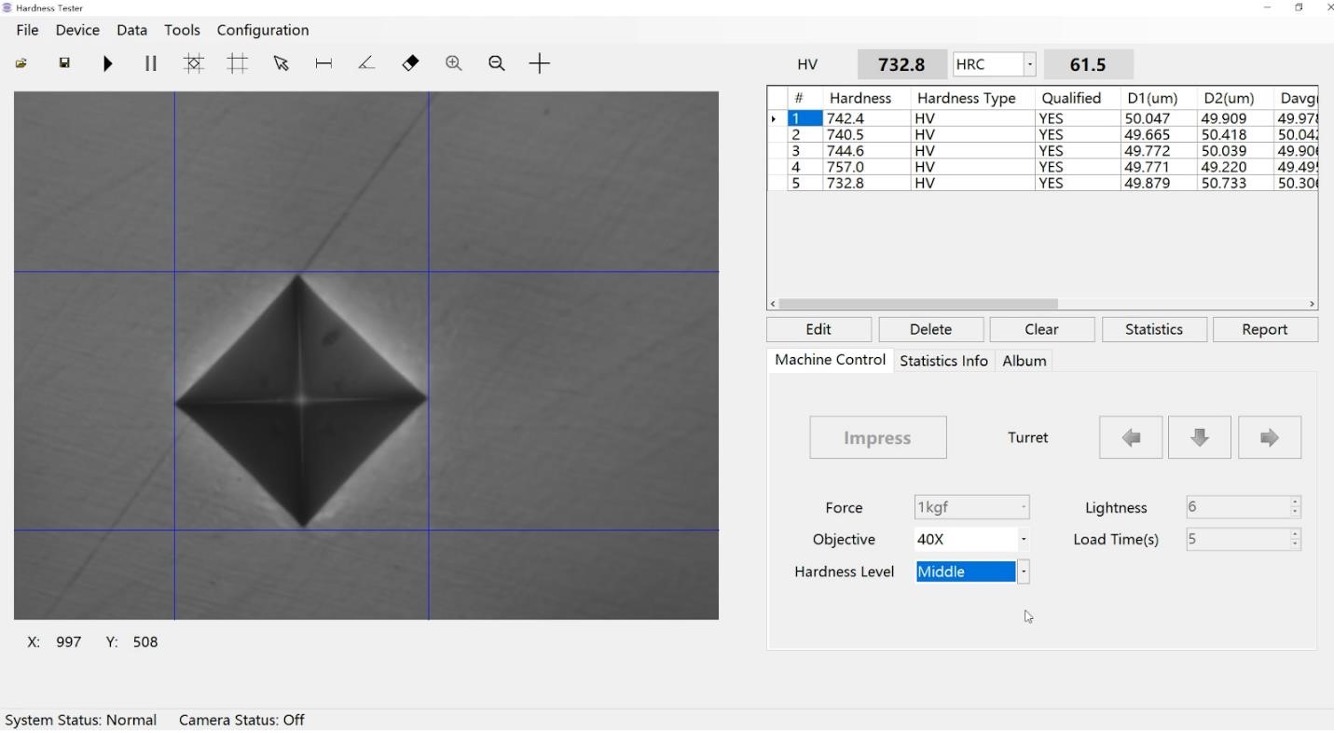
Main Functions:
- Auto hardness measurement: With a single click of a button, the software automatically measures the diagonals of the indentation, calculates the hardness value and the statistics (also support manual measurement);
- Hardness curve: With the depths of test points by user input, the software automatically plots the hardness curve(s).User may save and load the depths in a depth template file for later testing for convenience;
- Hardness Conversion: Converts HV to other hardness scales (HRA, HRB, HRC, HBW, HK, and others).
- Data memory / Store function: All data in the process of measurement will be saved in the right bottom sheet.
- Statistics: Automatically updates the statistical values such as average, min and max, standard deviation.
- Test report: Automatically generates WORD report with customizable template;
- Data archiving: Measurement data and images can be saved in one file for later retrieval;
- Knoop Scale: Can be configured for Knoop Scale measurement.
- Other Functions: Includes the basic functions of imaging system such as image capture, camera calibration, image processing, etc.
- Inbuilt camera design, the Software can do indentation image Measure and analysis work; THVS-A software can control Machine turret and adjust lightness.
Main Application Purpose:
- Steel, nonferrous metals, tinsel, cemented carbide, sheet metal, metallographic structure.
- Carburization, nitriding and decarburization layer, surface hardening layer, galvanized coating, coating.
- Glass, chip and ceramic material.
Standard Configuration:
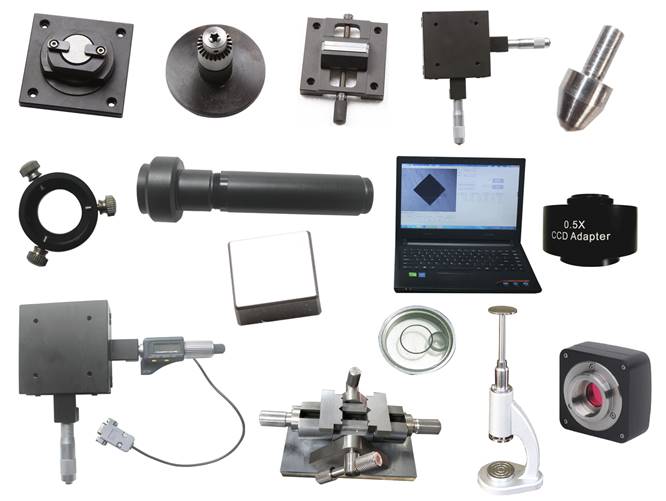
| Item | QTY |
| Weights Shaft | 1 |
| X-Y Cross Clamping Testing Table | 1 |
| Gradienter | 1 |
| Micro Vickers Hardness Block | 2 |
| Dust-proof Cover | 1 |
| Power Cable | 1 |
| Software | 1 Set |
| Manual | 1 |
| Weights | 6 |
| Level adjustment screw | 4 |
| Objective 10X, 40X | 1 of Each |
| Eyepiece 10X | 1 |
| Screw Driver | 2 |
| Fuse (2A) | 2 |
| Camera | 1 |
| Product Certificate | 1 |
Spare Parts and Consumables:
| Part # | Description of Part # | |
| NG-VKI | Dual Indenter Motorized Turret for Knoop and Vickers Testing Upgrade | |
| The addition of a 4th position on the motorized turret for a Knoop indenter. This allows the user to test either Vickers or Knoop without having to change any indenters. | ||
| NG-VDI | NIST Certified Vickers Diamond Indenter according to ISO 17025 | |
| NG-KI | NIST Certified Knoop Indenter according to ISO 17025 | |
| NG-860 | NIST Certified Micro-Vickers Test Block according to ISO 17025 | |
| Certified and NIST traceable. All loads and ranges available. | ||
| NG-860 | NIST Certified Knoop Test Block according to ISO 17025 | |
| Certified and NIST traceable. All loads and ranges available. | ||
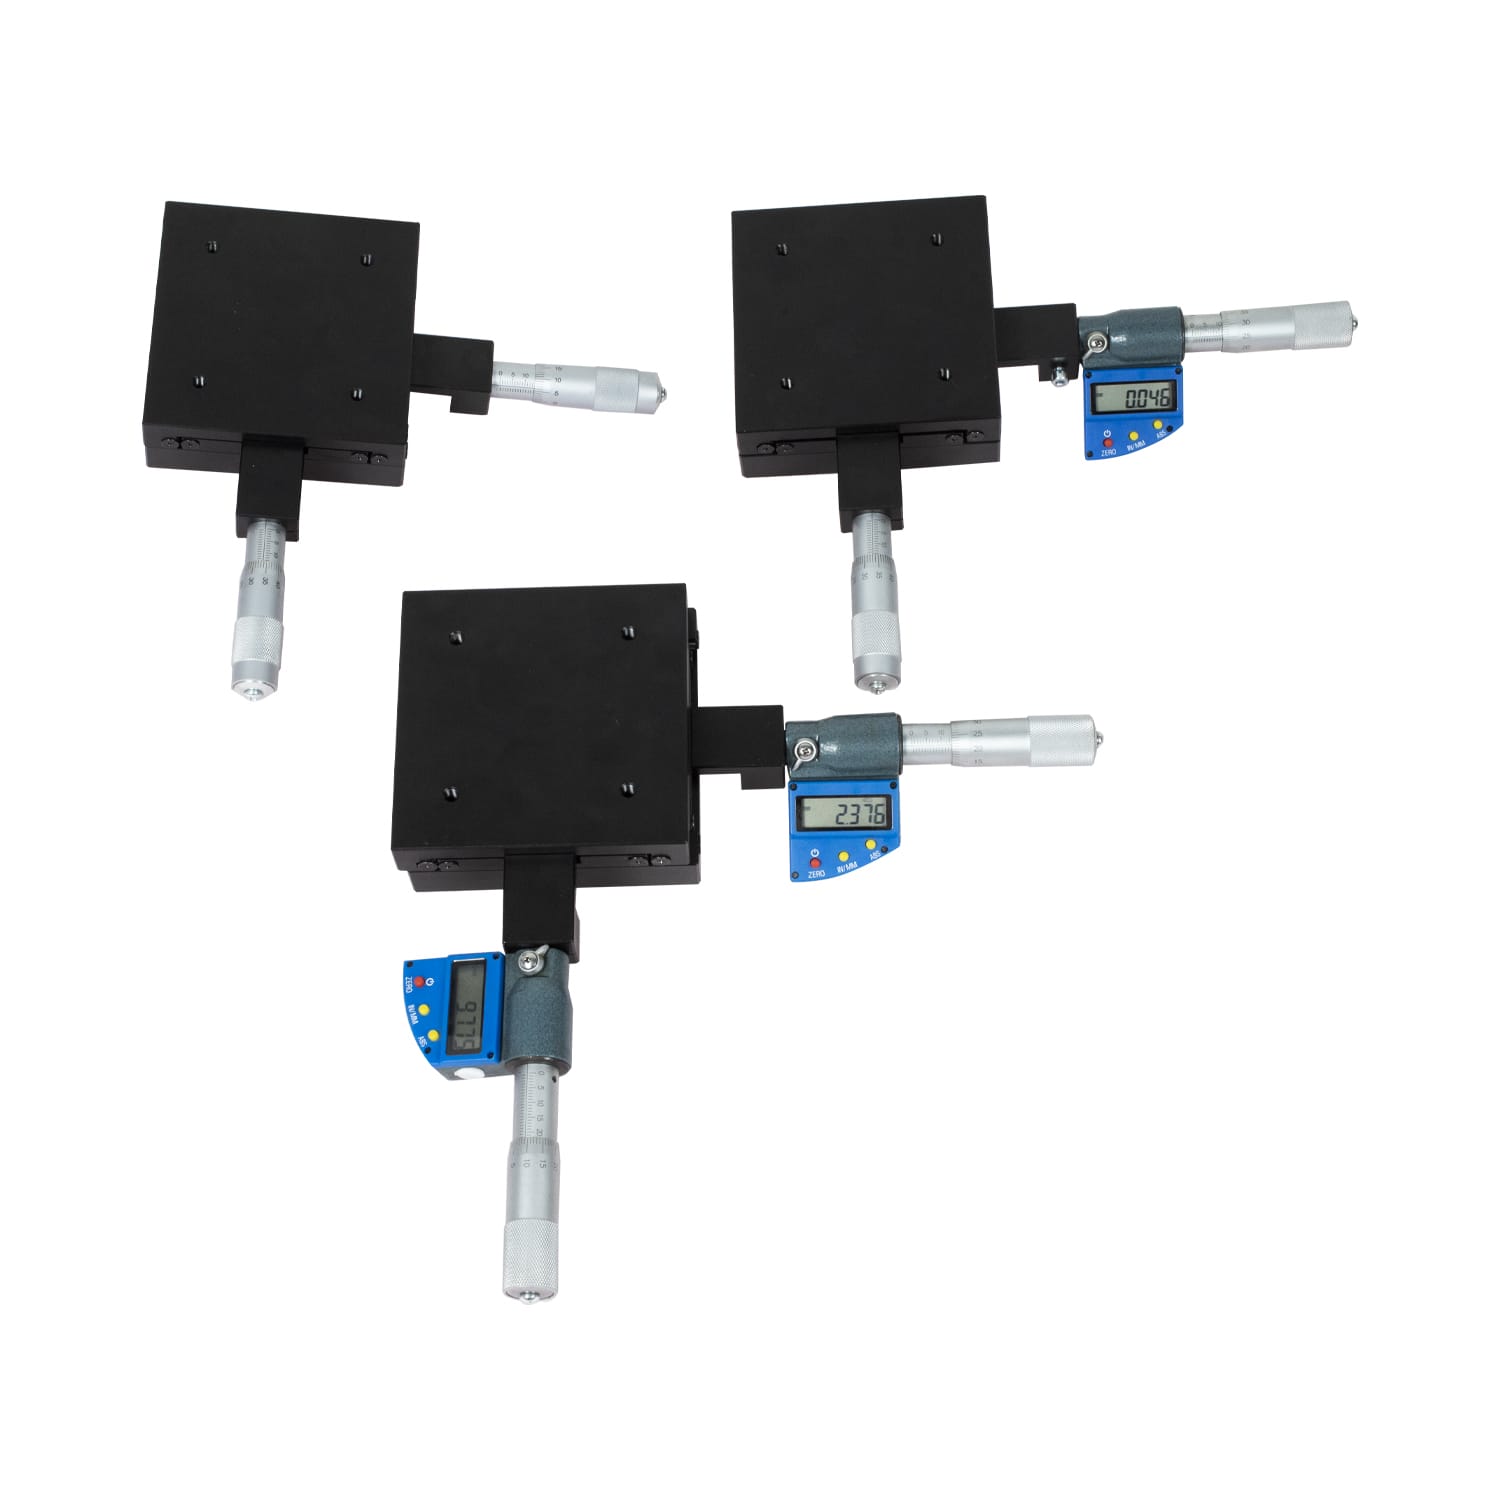
| NG-XY-MICRO | XY Stage with Digital Micrometer Upgrade | |
| NG-FLS2000 | Universal Leveling Fixture for Sample to Help Meet Parallelism Requirements for Hardness Testing | |
| NGFixture1000 |
Full Set of Fixtures for your NG-1000DGEN ModelIncludes: • Flat clamping test table • Thin specimen test table • Filament clamping test table |
|
| NG-AutoSoft | Automatic Software (to be purchased with NG-1000CCD) – Software automatically measures indentation | |
|
NG-USB- 1000DGEN |
Upgrade your NG-1000DGEN model to a USB Interface instead of built-inprinter USB interface instead allows to store hundreds of results. The data will be saved in the U-flash in Excell format. This way you can save thousands of readings without the need for printer. |
|
| NG-2kgf | Add 2kgf Load to your NG-1000 Series Vickers Hardness Tester | |
Vickers Hardness Tester | Unpacking and Set Up for Testing
FAQs
ISO 6507 is an international standard developed by the International Organization for Standardization (ISO). The full title of this standard is "Metallic materials - Vickers hardness test - Part 1: Test method."
ISO 6507-1 specifies the method for the Vickers hardness test for metallic materials. The Vickers hardness test is a common method for measuring the hardness of materials by pressing a diamond indenter into the surface of the material with a known force, and then measuring the size of the resulting indentation. This test method is widely used for measuring the hardness of materials with different thicknesses or for materials that are too small for other types of hardness tests.
ISO 6507-1 outlines procedures for conducting the Vickers hardness test, including requirements for the testing machine, preparation of test specimens, calibration, test force application, and measurement of the indentation size.
This standard is widely used in various industries, including metallurgy, manufacturing, engineering, and quality control, to assess the hardness of metallic materials.
Our Micro & Macro Vickers and Knoop Hardness Testers comply with ISO 6507.
Contact us to receive a personal quotation for our Micro & Macro Vickers and Knoop Hardness Testers.
ASTM E92 is a "Standard Test Method for Vickers Hardness of Metallic Materials" established by the American Society for Testing and Materials (ASTM) International.
This test method covers the determination of the Vickers hardness of metallic materials using a microindentation hardness testing machine. Vickers hardness is a measure of a material's resistance to indentation and is typically used for harder materials or when the test sample is thin.
In ASTM E92, the Vickers hardness is determined by measuring the diagonal lengths of the indentation left by a pyramidal diamond indenter. The hardness value is calculated based on the applied force and the surface area of the indentation.
Our Micro & Macro Vickers and Knoop Hardness Testers comply with ASTM E92.
Contact us to receive a personal quotation for our Micro & Macro Vickers and Knoop Hardness Testers.
ASTM E384 is a "Standard Test Method for Microindentation Hardness of Materials" established by the American Society for Testing and Materials (ASTM) International. This method is commonly used to determine the microhardness of materials, which involves measuring the resistance of a material to localized plastic deformation caused by indentation. Microindentation testing is often used for materials that are too small or too thin for traditional macroscopic hardness testing methods like Brinell or Rockwell hardness testing.
ASTM E384 provides guidelines for conducting microindentation hardness tests using various hardness testing machines, such as Vickers, Knoop, and instrumented indentation machines. The standard outlines procedures for sample preparation, calibration of the testing equipment, indentation procedures, and measurement of the hardness values.
This standard is widely used in industries such as metallurgy, materials science, engineering, and quality control to assess the mechanical properties of materials at small scales.
Our Micro & Macro Vickers and Knoop Hardness Testers comply with ASTM E384.
Contact us to receive a personal quotation for our Micro & Macro Vickers and Knoop Hardness Testers.
Instead of using the projected area, the Vickers hardness number is determined using the indent's surface area. Should the hardness be calculated based on the average of the two diagonals if the imprinted shape is deformed as a result of elastic recovery (particularly prevalent in anisotropic materials)? Based on the projected area of the impression, which may be determined using image analysis, it is possible to determine the Vickers hardness. Although there are few thorough investigations of this issue in the literature, the diagonal measurement is now the recommended method even for deformed indents. To meet all testing requirements, the Vickers hardness test offers two distinct force ranges: "Microindentation Vickers" (10–1000g) and "Macroindentation Vickers" (1–100kg). Vickers hardness values are continuous over the entire range of metal hardness since the indenter is the same for both ranges (typically HV100 – HV1000). As long as the test specimen is fairly homogenous, the HV value is constant, within statistical precision, over a very large test load range because the shape of the Vickers indentation is geometrically comparable at all test loads.
These conditions include test specimens below the minimum thickness for the depth of indentation; a test impression that falls too close to the edge of the specimen or another impression; or testing on cylindrical specimens. The maximum height of the specimen is 8.5cm, and the maximum depth of the specimen is 12cm.
To get a personalized quote, you can click here.
A warranty is a promise that a producer or other similar entity makes about the state of their product. It also refers to the conditions and circumstances under which fixes or exchanges will be provided in the event that the product does not perform as originally intended or stated. Express and implied warranties are the two main types. There are various warranty categories, each with its own terms, conditions, and guarantees, within each category.
An express warranty is a promise made by a seller to a customer that the goods they have purchased will meet their expectations. If there are flaws in the merchandise, the vendor will either fix them or replace them. The guarantee may be stated verbally or in writing in advertisements, on the product, or in other ways. An implied warranty, often known as an implied warranty of merchantability, ensures that the purchased item performs as intended. It doesn't have to be expressed to be true. Unless specifically stated otherwise, such as with "as is" transactions, this warranty is implied.
The warranty for The NG-1000: Micro Vickers and Knoop Hardness tester is 12 months.
Click here if you want to receive a quote or have any more questions.
Magnification is the process of enlarging something's apparent size rather than its actual size. This enlargement is measured in terms of a calculated quantity known as "magnification." The term "minification" or "de-magnification" is frequently used to describe a reduction in size when this number is less than one.
Magnification typically refers to procedures like enlarging graphics or images to show more detail, boosting resolution, using a microscope, printing methods, or digital processing. The viewpoint of the image is unaffected by image magnification in every situation. Optical magnification is a dimensionless number since it measures the difference between an object's apparent size (or its size in an image) and its actual size. Optical magnification is sometimes referred to as "power" (for example, "10× power"), although this can lead to confusion with optical power.
The NG-1000 - Micro Vickers and Knoop Hardness testers have the following magnification: 100X (Observation), 400X (Measurement), (Can be extended to 150X or 600X).
If you need more information or would like to obtain a quote, please click here.
The following international standards are used by the NG-1000 Micro Vickers and Knoop Hardness Tester: ISO 6507 and ASTM E-384.
For the three separate test force ranges for metallic materials, including hard metals and other cemented carbides, ISO 6507 specifies the Vickers hardness test technique. As a function of the test force, the Knoop indenter does not create an indentation that is geometrically equivalent. Under the same test conditions, the indentation depth for a Knoop indentation is shallower than for a Vickers indentation because of its rhombic shape. The Knoop indenter can therefore be particularly helpful for assessing thin coatings or hardness gradients on sectioned samples.
The accepted test procedure for determining a material's Knoop and Vickers hardness is ASTM E384. Test loads normally vary from 100 to 500 grams but can be as low as 1 gram and as high as 1,000 grams. At all test forces, the Vickers indenter often creates an indentation that is geometrically comparable. The list of requirements that adhere to our A2LA and ISO accreditation is provided below.
- Knoop: 100, 500 HK
- Vickers: 100g, 300g, 500g, 1000g HV
- ASTM E384
- ASTM F606
- ASTM F606M
If you are looking for more information or want to obtain a personalized quote, click here.
Since the necessary calculations are independent of the indenter's size and the indenter may be used for any materials regardless of hardness, the Vickers test is frequently simpler to apply than other hardness tests. As with all accepted methods of determining hardness, the fundamental idea is to look at a material's resistance to plastic deformation caused by a typical source. All metals can be tested with the Vickers test, which also has one of the widest hardness scales available.
The Vickers Pyramid Number (HV) or Diamond Pyramid Hardness is the term for the hardness measurement provided by the test (DPH). Although the hardness value can be expressed in pascals, pressure, which also employs the same units, should not be mistaken. The hardness number is determined by the load over the surface area of the indentation and not the area normal to the force and does therefore not pressure. These are the Vickers Scales for the NG-1000 – Micro Vickers and Knoop Hardness tester: HV0.01, HV0.025, HV0.05, HV0.1, HV0.2, HV0.3, HV0.5, HV1, HV2 (Optional).
Click here to obtain a personal quotation.
The NG-1000 - Micro Vickers and Knoop Hardness tester can convert your Vickers value to HRA, HRC, HR15N, HR30N, HR45N, and HB. An alternative to the Vickers approach is the Knoop method. The two approaches are different from one another in the following ways:
The Vickers diamond indenter penetrates the specimen twice as deep as the Knoop diamond indenter with the same test load. The Knoop method is particularly useful for testing very thin layers because of its tiny indentation depth (e.g. aluminum foil).
The Knoop method is best used with small, longish test specimens because of the long and thin (elongated) test indent, whereas the Vickers method is preferable for small, spherical specimens (square indentation).
The Vickers indentation might result in cracking when evaluating exceptionally hard and brittle materials (glass, ceramics), hence the Knoop method is best for these materials (measurement accuracy).
Given that the Knoop diagonal (the longitudinal diagonal) is around three times longer for any given indentation depth than the arithmetic mean of the Vickers diagonals, the Knoop method offers superior measurement precision, particularly when used in conjunction with extremely light test loads.
Want to receive a personalized quote? Click here.
The NG1000 Micro Vickers and Knoop Hardness tester features an easy-to-see LCD display in all lighting environments, a motorized turret, a built-in mini printer and a user-friendly menu for operation. By entering these values into the NG1000 LCD panel, the system will generate a Vickers/Knoop hardness value and display it to be written down or printed on the mini printer. NG1000CCD has all the features of the NG1000DGEN hardness tester with the addition of a CCD camera and user-friendly NG VickSoft software.
The user-friendly control panel allows you to navigate through the NG1000 menu easily. Test parameters can quickly be changed to suit your testing requirements. The NG1000CCD VickSoft software lets you view all your hardness results in an easy viewing panel. You can store and look back at your indentation images for re-measuring when necessary. The NG-VickSoft also allows you to plot your case depth curves and create reports for your hardness testing measurements.
If you would like to obtain a personalized quote, you can click here.
NextGen Material Testing, Inc. is committed to providing every client with the highest quality equipment for the lowest possible price. We achieve this through our corporate infrastructure. Low overhead, high production volumes, and cutting out any potential middlemen allow NextGen Material Testing, Inc. to deliver better quality testing equipment at a lesser cost.
We understand that purchasing Quality Control Equipment is the equivalent of entering into a long-term relationship with your Quality Provider that can last for decades and beyond. This is why NextGen is honoured to provide you with the highest quality products to reflect the same loyal, long-term commitment back to you. The quality of relationships NextGen develops with all of our clients is one of our secrets to success that creates a mutual win-win situation and leads to your ultimate satisfaction. NG1000 Micro Vickers and Knoop Hardness tester Power Source 110V/60Hz/1Ph and overall Dimensions are 49cmx18.5cmx51.5cm (LxWxH). Weight is 45kg.
If you are looking for more information or would like to obtain a personalized quote, you can click here.
LEDs may be little, but new high-brightness models produce a considerable amount of light. First used as status and indicator lamps, and more recently in under-shelf illumination, accent lighting, and directional marking applications, high-brightness LEDs have emerged within the last six years. But only recently have they been seriously looked upon as a feasible option in general-purpose lighting.
Originally used as status and indicator lamps, and more recently in under-shelf illumination, accent lighting, and directional marking applications, high-brightness LEDs have emerged within the last six years. But only recently have they been seriously looked upon as a feasible option in general-purpose lighting applications. Things like lumen-per-watt efficacy and colour consistency must be improved, and reliability and lumen maintenance should be addressed.
Thus, NG-1000 – Micro Vickers and Knoop Hardness tester uses an LED Cold light source (no heat generated from the light source - service life of light source can reach 100,000 hours)
If you would like to obtain a personal quote or if you have any other questions, you can click here.
Mechanical engineers employ indentation hardness tests to assess a material's resistance to deformation. These tests, which can be carried out on a macroscopic or microscopic scale, involve indenting the substance under examination until an impression is made.
When testing metals, the relationship between indentation hardness and tensile strength is usually linear, but it is not always accurate and frequently only applies to narrow ranges of strength and hardness for each indentation shape. This link facilitates economically crucial nondestructive testing of bulk metal deliveries with lightweight, even portable equipment, such as hand-held Rockwell hardness testers. Poor technique, inaccurate equipment calibration, and the process's strain hardening effect are the main causes of inaccuracy in indentation tests. However, it has been experimentally determined through "strainless hardness tests" that the effect is minimal with smaller indentations.
The NG-1000 – Micro Vickers and Knoop Hardness tester offer the following optional items: 15x Eyepiece, 2000gf Load, Dual Vickers/Knoop Indenter.
If you would like more information or to obtain a personalized quote, you can click here.
Hardness is a material’s quality to withstand localized deformation. It may be especially important when looking for a suitable material for an environment that includes little particles that can induce material wear. Soft materials suffer indentations while hard ones resist any change in shape.
Hardness should be viewed in context with other material properties like strength, elasticity, etc. For example, many hard materials tend to be brittle, limiting their use-cases. The SI unit of hardness is N/mm². The unit Pascal is thus used for hardness, but hardness must not be confused with pressure.
The different types of hardness discussed above have different scales of measurement. For scratch, indentation, and rebound hardness, the measurement methods vary (e.g. Brinell, Rockwell, Knoop, Leeb, and Meyer). As the units are derived from these measurement methods, they are not suitable for direct comparison.
However, you can always use a conversion table for comparing the Rockwell (B & C), Vickers and Brinell values. The commonly used units for hardness measurement are:
- Brinell Hardness Number (HB)
- Vickers hardness number (HV)
- Rockwell hardness number (HRA, HRB, HRC, etc.)
- Leeb hardness value (HLD, HLS, HLE, etc.)
Minimum measuring unit for NG-1000 – Micro Vickers and Knoop Hardness tester 0.01μm.
Click here to obtain a personal quotation.
NextGen Material Testing, Inc. prides itself on providing you with fully calibrated equipment which is over 90% ready for use. Our user-friendly interface, installation and training videos, and easy-to-read operations manuals allow the operator to grasp the operation of the equipment for immediate use swiftly. Additionally, our service engineers are happy to further assist you by phone, e-mail, Skype, as well as Team Viewer to provide you with the ability to operate your equipment right away.
Yes, training and installation are available for all of our equipment. A team of trained professionals stands ready to serve your quality service needs. As a global company, we can provide training and installation anywhere our clients are. Please contact your product consultant to request the training and installation quotation based on your purchased equipment. NextGen Material Testing, Inc. offers a highly precise and cost-effective option for all Vickers and Knoop testing requirements. The NG1000 hardness tester is available in different configurations (AGEN, DGEN and CCD) to meet all requirements for sample volumes and required accuracy.
If you would like to obtain a personal quote or if you have any other questions, you can click here.
The NG-1000 - Micro Vickers and Knoop Hardness tester have a 10x Magnification Eyepiece.
Analogue Micro Vickers and Knoop Hardness tester measurements are made through the eyepiece. The operator must first rotate the dial on the microscope to align the micrometres with the diagonals of the indentation. Once aligned, the user must manually read the lengths of the diagonals on the ruler visible through the eyepiece. You then enter the diagonal lengths into the tester through the numbered keypad, and the tester will automatically convert the diagonal lengths to your hardness value and display it on the LCD screen.
Digital Micro Vickers and Knoop Hardness tester measurements are made through the eyepiece. This system is equipped with an encoder. After using the micrometres to measure the diagonals, the system will transmit your readings from the eyepiece into the system through a single click of a button. The system will generate your hardness reading and display it on the LCD.
CCD Micro Vickers and Knoop Hardness tester measurements are performed through a CCD Camera combined with Analytical Software. The measurements can be made through the eyepiece, or they can be done through the analysis software and CCD camera. The advanced accuracy of this Vickers hardness testing system, the Motorized Turret and the Built-in-Printer make this machine the top pick for quality control laboratories. To obtain a personalized quote, click here.
ASTM E 92 Standard Test Method for Vickers Hardness of Metallic Materials
This specification applies to the determination of Vickers hardness of metallic materials using an applied force from 1 kgf. to 120 kgf. Part B is applicable to the verification of the Vickers hardness testing machines. And part C is in reference to the calibration of standardized test blocks. Complete specifications may be obtained from ASTM International.
This standard includes two classes of standardized tests: the Routine test (with routine accuracy), and the Verification, Laboratory, or Referee Test (with a much higher degree of accuracy required). WMT&R specializes in the Referee Test.
The Vickers Hardness Test consists of a small pyramid-shaped diamond indenter with an apical angle of 136°, which is pressed into the test sample at a predetermined load. The resulting indentation is then measured in both axis from tip to tip. The average of the two axis measurements is then converted into a Vickers Hardness number by the use of a formula, or more often, a chart based on the formula. When choosing the test load, the highest load that can be performed on the specimen will give the most accurate results. A higher load produces a larger indentation with better measurement resolution and, therefore, more reliable results.
If you would like to obtain a personal quote or if you have any other questions, you can click here.
As with every other hardness test, however, the Vickers procedure is not without some flaws. Here are some of them:
- Extensive Material Preparation
Since optical evaluation is featured in the Vickers test, the quality of the specimen’s surface must be considered good. This means that the place where the indenter is going to make contact with the specimen must be cleaned, ground, and polished. Otherwise, the test results are unreliable.
- Slow Test Cycles
Compared to the Rockwell method, the Vickers test is comparatively slower. It would take 30 to 60 seconds for the test to be conducted. This does not include the time taken to prepare the test location for the procedure.
- Price
Due to the need for optical evaluation during the test, a Vickers Hardness tester must be equipped with an optical measurement system. As such, a Vickers hardness tester is more expensive to purchase brand new compared to a Rockwell tester.
If you are looking for more information or would like to get a personalized quote, you can click here.
Depending on how high your daily specimen testing volume is, you may want to consider our NG-5000 CCD - Macro Vickers Hardness Testing Systems. This digital macro Vickers hardness tester comes with all of the capabilities of the DGEN model as well as the added value of the optical software designed for ease-of-use and elimination of human error. In order to speed the process, you may choose to upgrade to our automated software for your macro Vickers hardness tester, which allows you to capture indentation automatically and received a readout virtually instantly. Contact us today to learn which macro Vickers hardness tester is the right solution for you.
The benefits of the digital Vickers hardness testing systems can be described on two levels. Firstly, all Digital Vickers systems come with a user-friendly touch pad interface. The machine is capable of performing indentations in seconds and provide an accurate reading. The digital Vickers hardness testing system can also be used with our CCD Optical Analysis upgrade for the highest degree of accuracy and full elimination of the human error factor. The solid framing and state of the art engineering will have you benefit from this machine for many decades to come. Learn more about our Digital Vickers Hardness Testing systems for your Macro Vickers or Micro Vickers needs.
Best experience shows that the optimal solution for your Micro Vickers Hardness testing needs is highly dependent on your technical specifications. For example, if unwavering accuracy is your only focus, we would suggest our NG 1000 CCD Model - Micro Vickers and Knoop Hardness Testing System with CCD Optical Analysis software. If you were looking for something more affordable, yet easy to use, we would suggest the NG 1000 AGEN Model - Micro Vickers and Knoop Hardness Testing System with Analogue Display. For the sweet spot of the two worlds, our most commonly purchased Micro Vickers Hardness tester is the NG 1000 DGEN Model - Micro Vickers and Knoop Hardness Testing System with Digital Display. This unit is exceptional for both accuracy and ease-of-use. Regardless of what your Micro Vickers hardness testing needs are, NextGen has you covered with the latest and greatest in the industry. Contact our qualified consultants today to learn which unit best fit your needs.
NextGen's Micro Vickers Hardness Testing line up consists of 4 primary options. The analogue, digital, digital with CCD optical analysis and advanced semi- or fully automatic Vickers hardness testing machines. NG-1000 Series - Micro Vickers Hardness Testers are sure to meet your metallographic and other hardness testing requirements. Contact us today to learn more about how we can meet your Vickers hardness testing needs.
AGEN - Analogue Vickers Hardness Tester models:
In this model of Vickers Tester Manufacturing measurements are made with the eyepiece. The micrometers are used to measure the diagonals. The numbered keypad is then used to manually enter your measurements. The hardness testing results will be generated on the LCD screen.
DGEN - Digital Vickers Hardness Tester models:
In this model of Vickers Tester Manufacturing measurements are made with the eyepiece. Adjust the micrometer to the correct positioning of the diagonals. The equipped encoder allows for the readings to be transferred to the machine with a single click of a button. The hardness reading will then be generated on the LCD screen.
CCD - Digital Vickers Hardness Tester models with CCD Optical Analysis Software:
This Vickers Tester Manufacturing system's foundation is the NG-1000DGEN and is additionally equipped with a CCD Camera and Analysis software. The operator can make measurements using the eyepiece or the analytical software and the CCD camera. This unit provide the highest accuracy and eliminates all operator's error.
Request a quotation today!
There are two options to go with for an additional load force requirements:
A. You could order the 2000g weight to conduct the 2kg Vickers hardness test with the standard configurations of 10-1000g. The 2kg test load can be found in the Optional Accessories section of the Micro Vickers Hardness Tester or Macro Vickers Hardness Tester's quotation.
B. Depending on your application requirements you may also want to consider our Macro Vickers Hardness Testing System - NG 5000 Series. The Macro Vickers Hardness Testing System - NG 5 can perform a test load range from 300g (1.96N) to 5kg (49N), while the Macro Vickers Hardness Testing System - NG 10 unit can perform a test range from 500g (4.9N) to 10kg (98N).
Learn more about Micro Vickers Hardness Testing Systems and Macro Vickers Hardness Testing Systems and request quotation today.
No, we do not offer stands for our Micro Vickers Hardness Tester - NG-1000 Series. We advise to purchase such stands locally as a more cost-effective solution.
NextGen makes it easy for you to get additional accessories and parts for your Vickers Hardness Testing System. You may submit your request to [email protected] with your required accessories and/or spare parts. Our team will provide you a detailed quotation shortly.
Another option is to fill out the Service Request application. We ask that you include the Serial # of your purchased Vickers Hardness Testing equipment.
Related Products
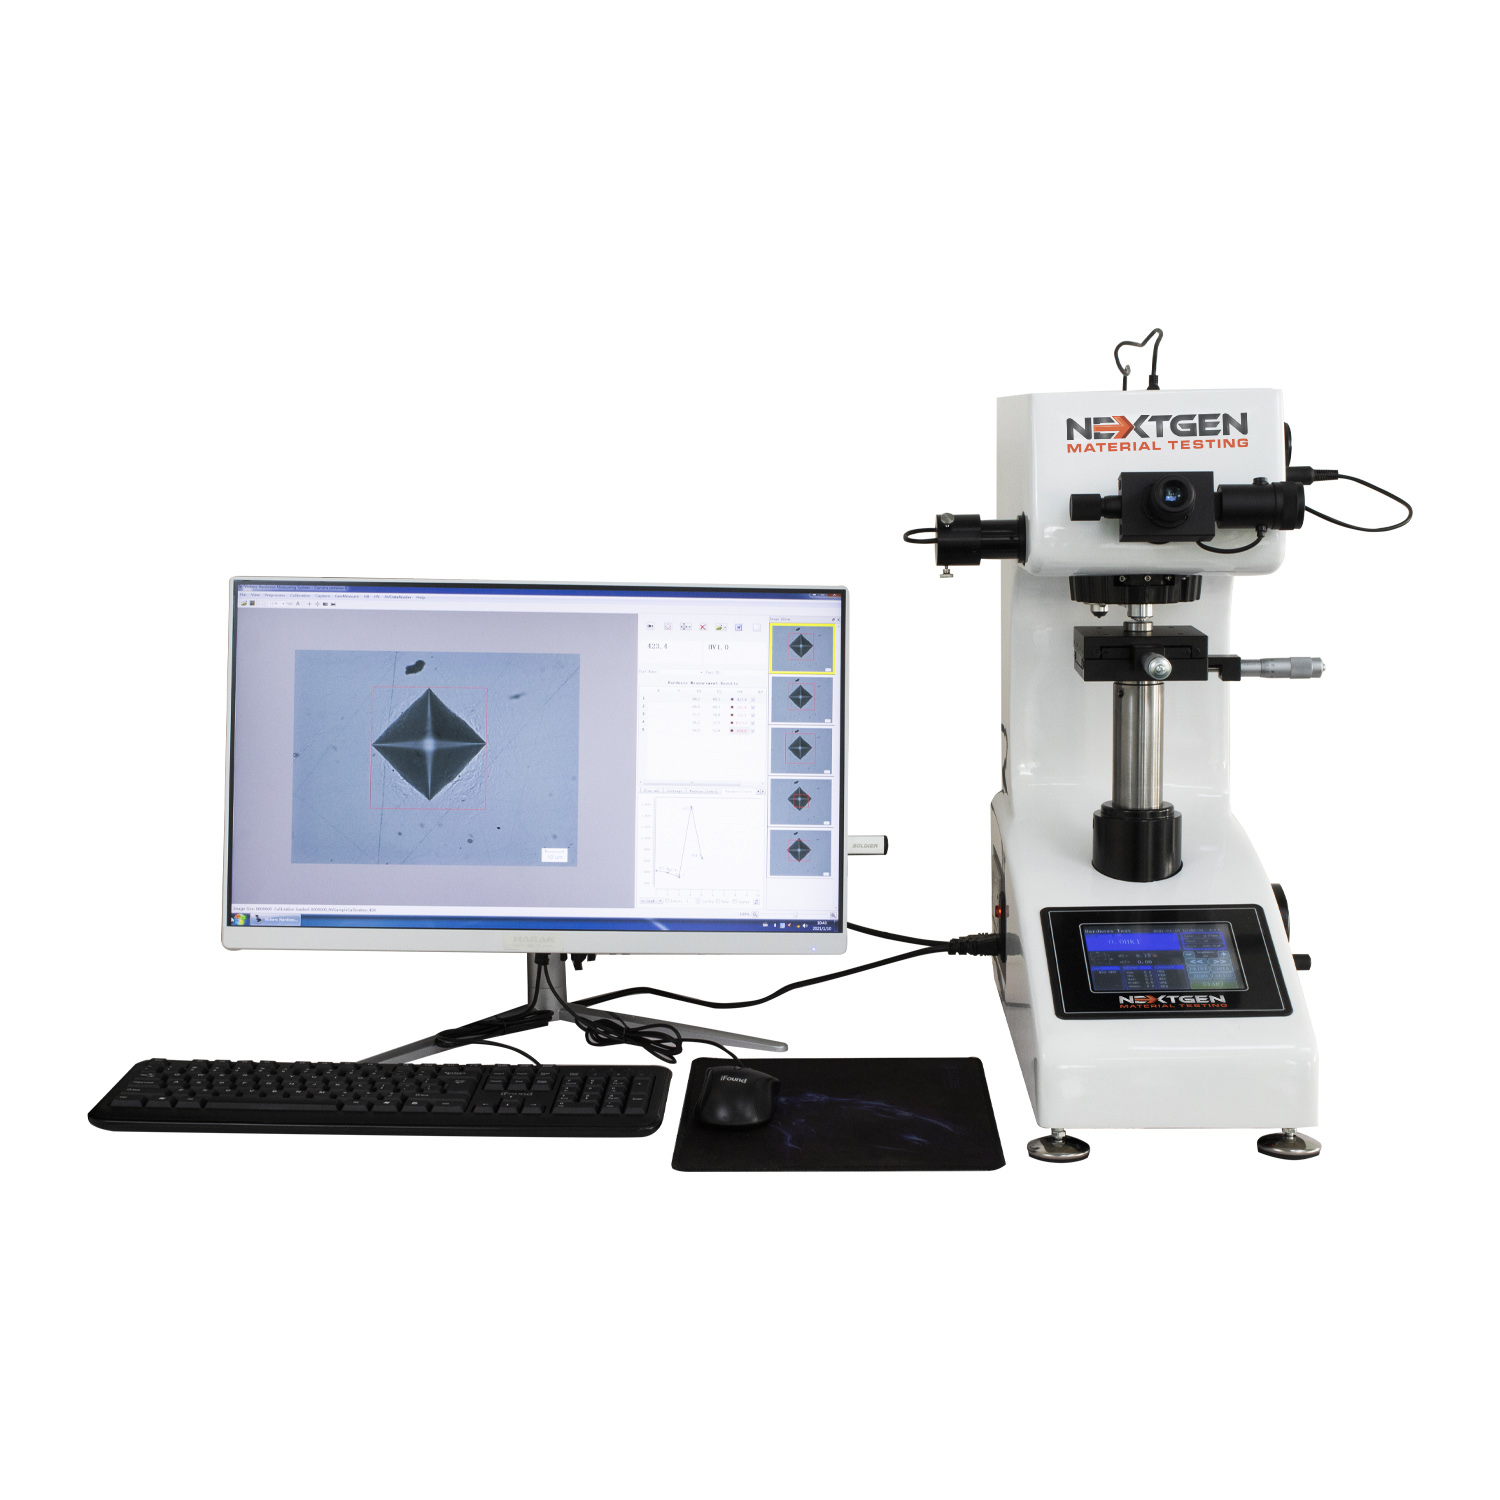
Macro Vickers Hardness Tester - Standard Digital, Digital and Digital with CCD Optical Analysis Software
NG-5000 Series
NextGen Macro Vickers Hardness testers are available with different load capacities and are available in Standard Digital, Digital or CCD configurations. With 5kgf, 10kgf, 30kgf and 50kgf maximum loads available, the NextGen Macro hardness testers can fit all of your Macro testing requirements.
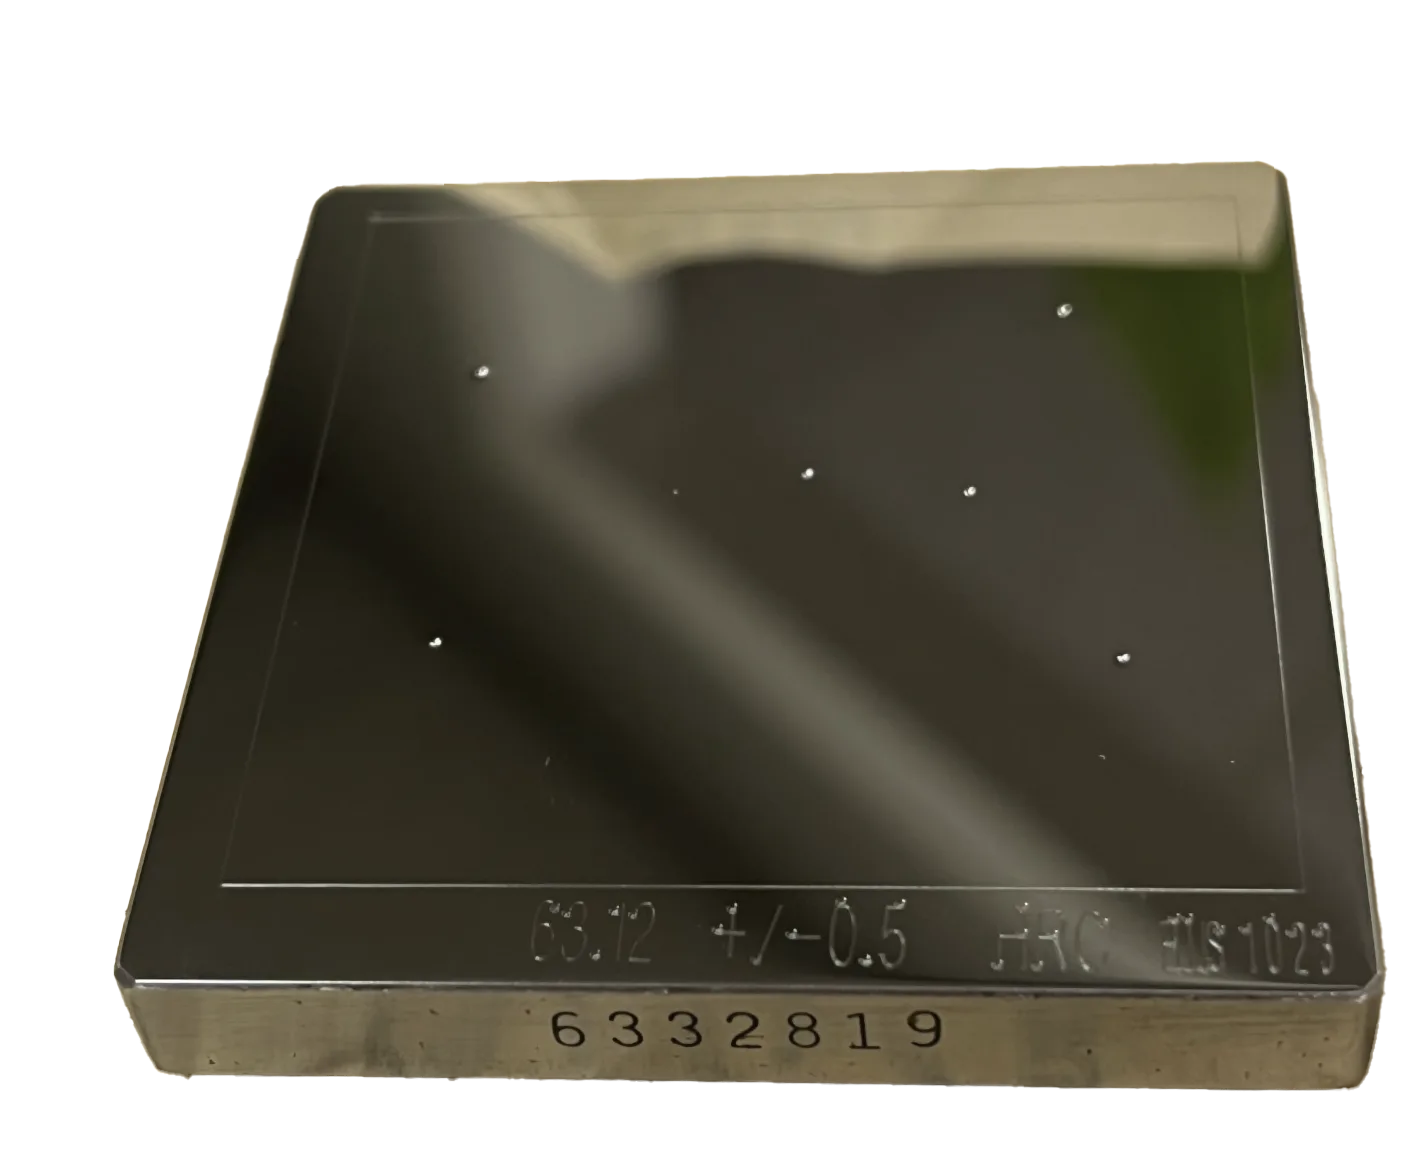
Hardness Test Blocks, Indenters and Hardness Testing Accessories
Certified Test Blocks are a requirement as a reference material for any type of hardness testing. At NextGen, we understand the importance of a Test Block to ensure the accuracy of your hardness testing procedures.
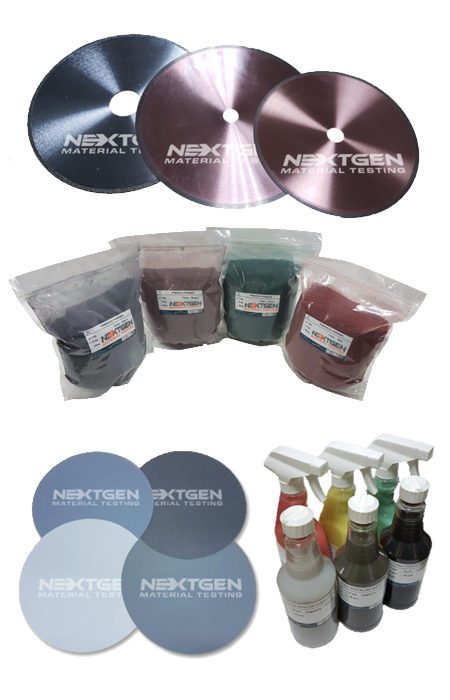
Metallography Consumables
Learn about the full scope of NextGen's cutting, polishing & grinding, mounting and etching metallography consumables. Our consumables are compatible with virtually all global brands, offering a rare combination of exceptional quality, longevity and affordability.
